
Hey all! This is Gaian coming to you with a brand new perspective for a month that I’ve never ever said ever before. Completely unique.
“September has been the slowest month yet, and all while being blindingly fast; I can barely track what went on.”
But one thing I caaan traack issss…
OPAL LAUNCH!

We did it! We finally brought around our top-secret project; lined it up with a release date; worked up to the morning before, fixing bugs to the last minute; and then launched!
Opal Launcher was released September 30th, the last day of the month, and we couldn’t be happier to get it out. No crunch, thoroughly stable and capable, and with everything we intended to include for release: Being able to start with nothing; getting your dependencies, engines, and assets; starting a project, building and configuring it; then export and run your project fully standalone!
All about Opal.
– We began discussion around a “Project Manager” in November 2024.
– OPAL’s name was chosen in October 2025.
– And finally, in 2026 – from January into September – we worked more formally on developing Opal for an actual functional release.
Developing Opal, and all the property surrounding it: Licenses, Branding, Website, Documentation, and Theming, was a study in meticulous grilling of a project, bringing it around to a high standard of quality in all its pillars.

The website, the biggest portion of the project I was most responsible for, started off as a copy-paste clone of the gs_play website; if it ain’t broke, might as well not fix it. But really, over the months I truly discovered how much further an “okay” project can be refined and polished.
When I’d relate to other software websites, I’d see some level of quality that spoke to a sort of “wow-factor”. It looked polished and deliberate in everything it was doing. The screenshots that were included. The galleries and carousels. The wording, the subtitles, the order in which sections and topics are covered. So much that, at first, the site did not have at all. It carried the same beats: carousels, images, the screenshots, subtitles and catchphrases. But really, were just kinda… there…
Slowly but surely, I got the main page looking compelling and pretty. The carousel is flashy, the images on all of the feature pages change with the light/dark theme of the site. Fully reflecting the appeal of the software regardless of whether you’re a dark or light themer. As we refined the messaging and concepts behind the Opal brand. It’s typeface, colour scheme, and conceptual basis, we were able to tie the phrasing across the site to match.
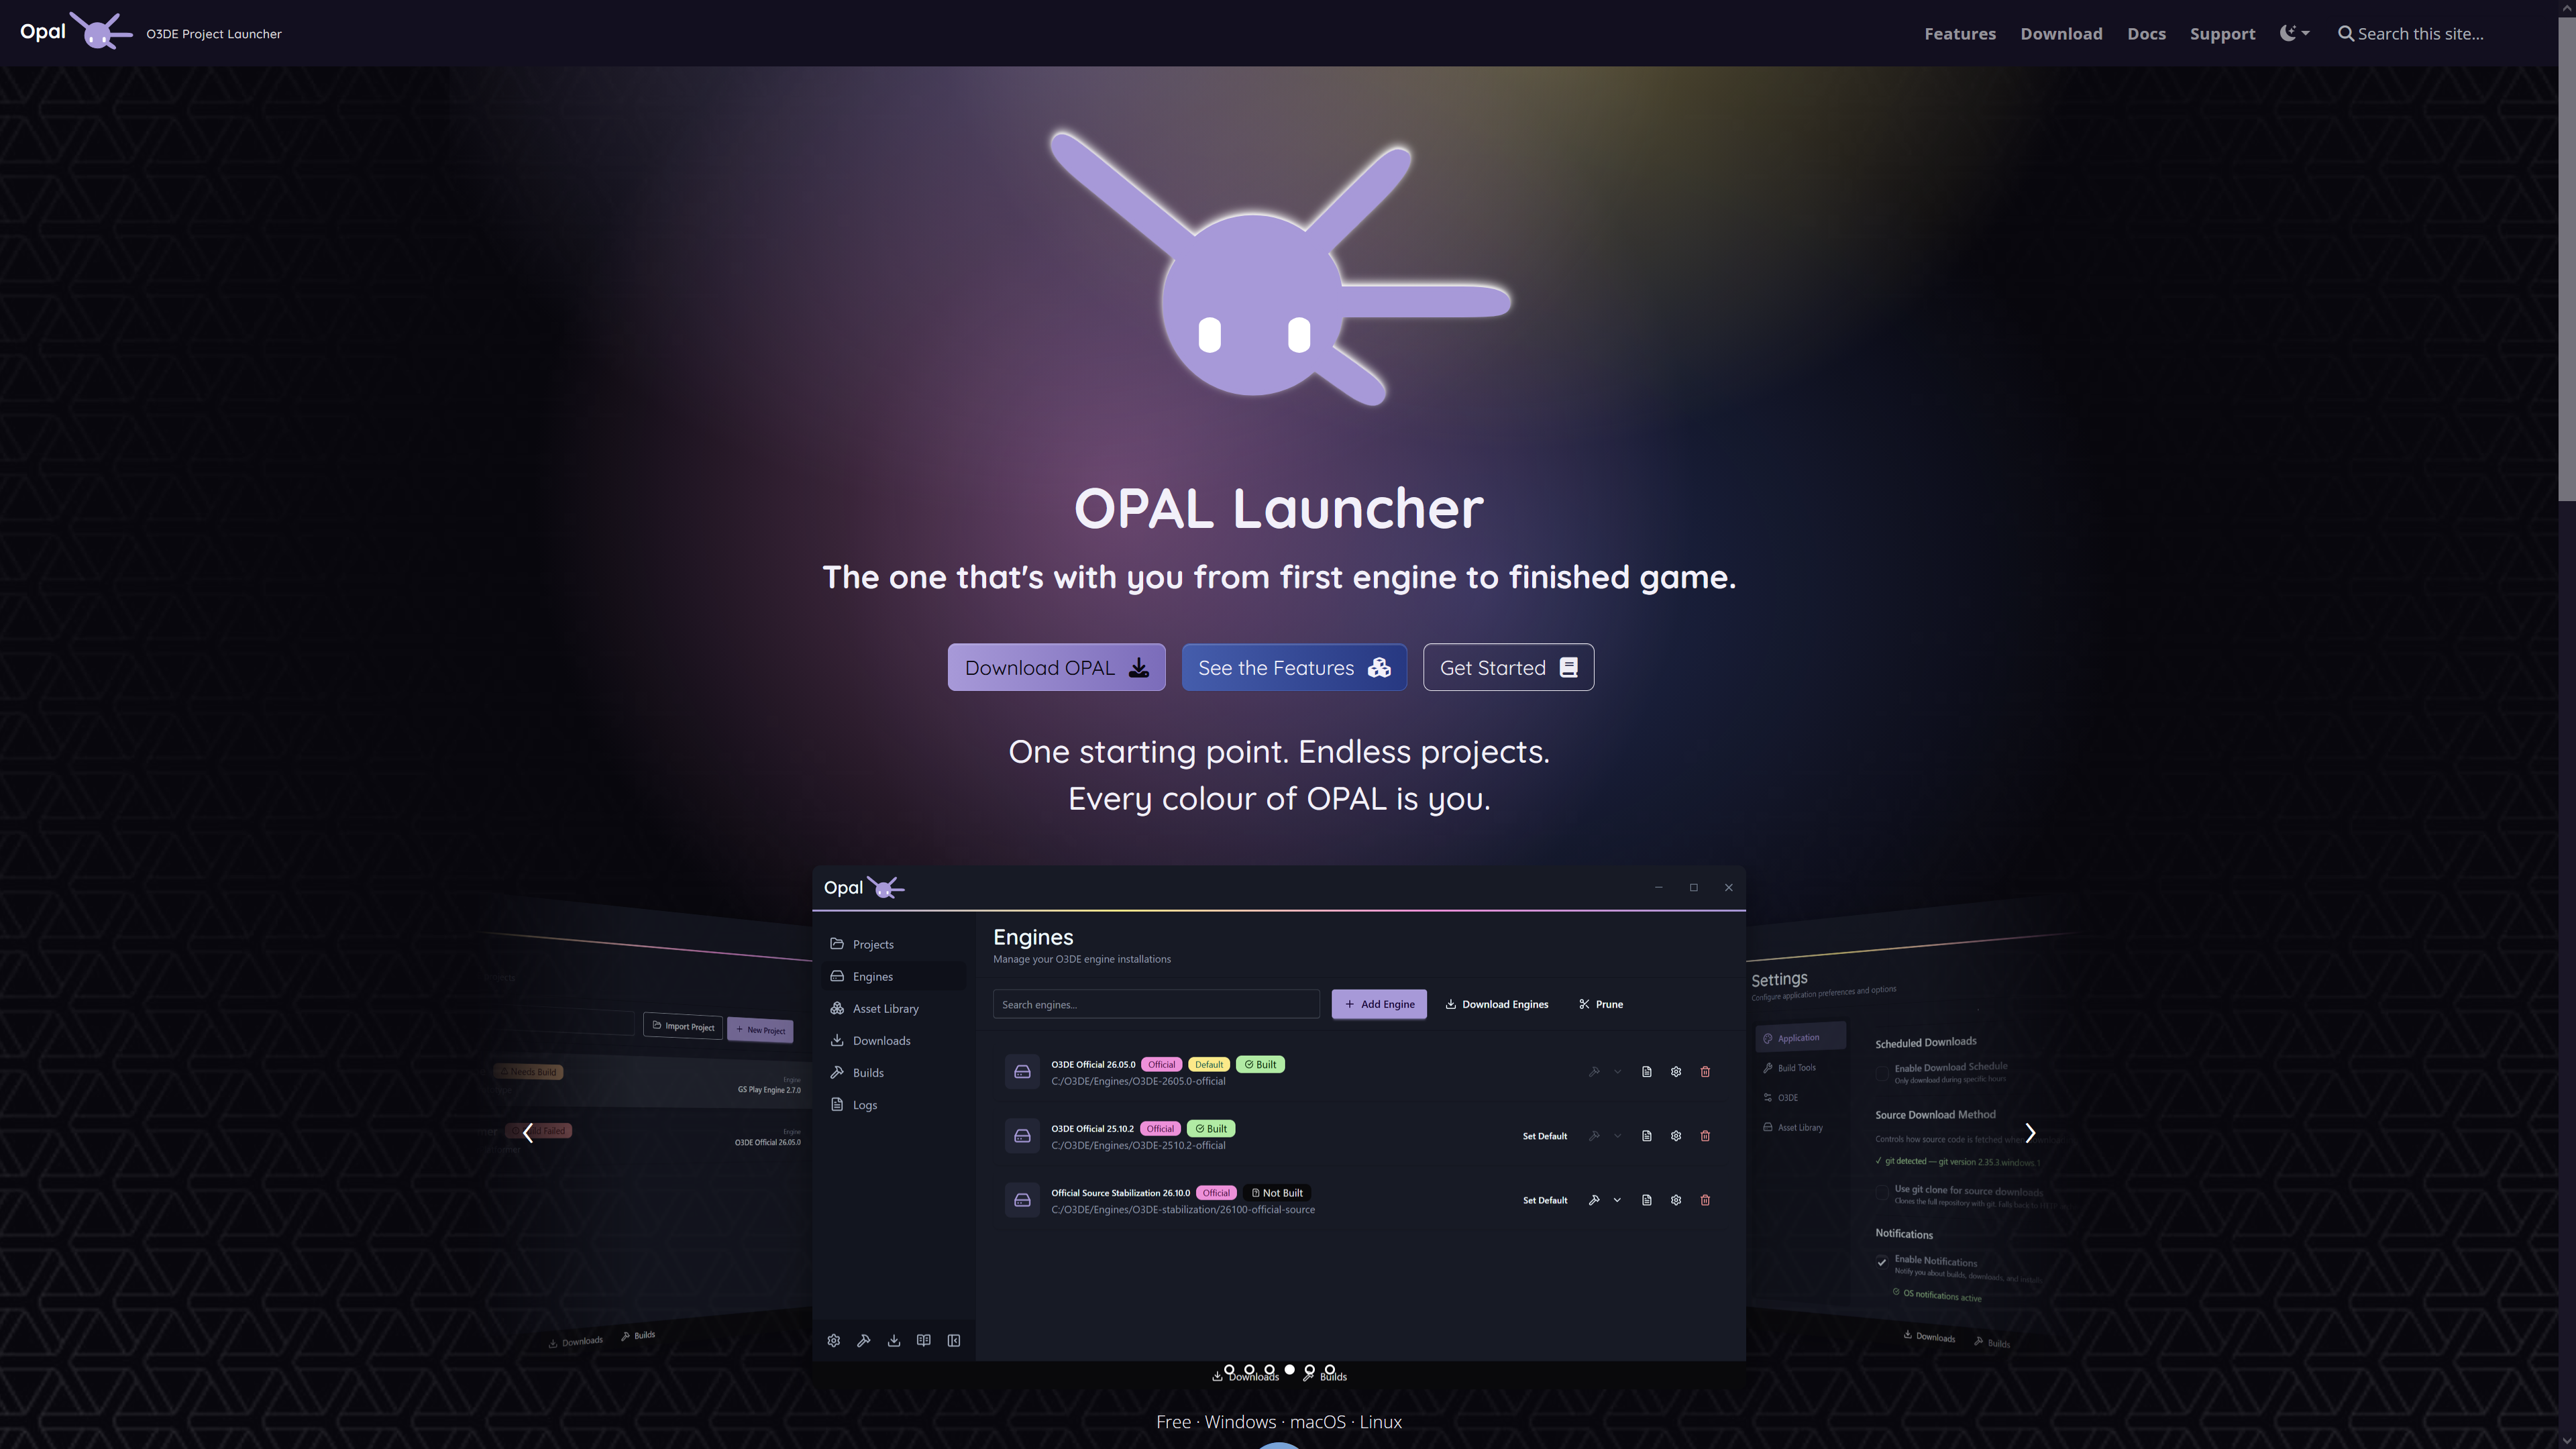
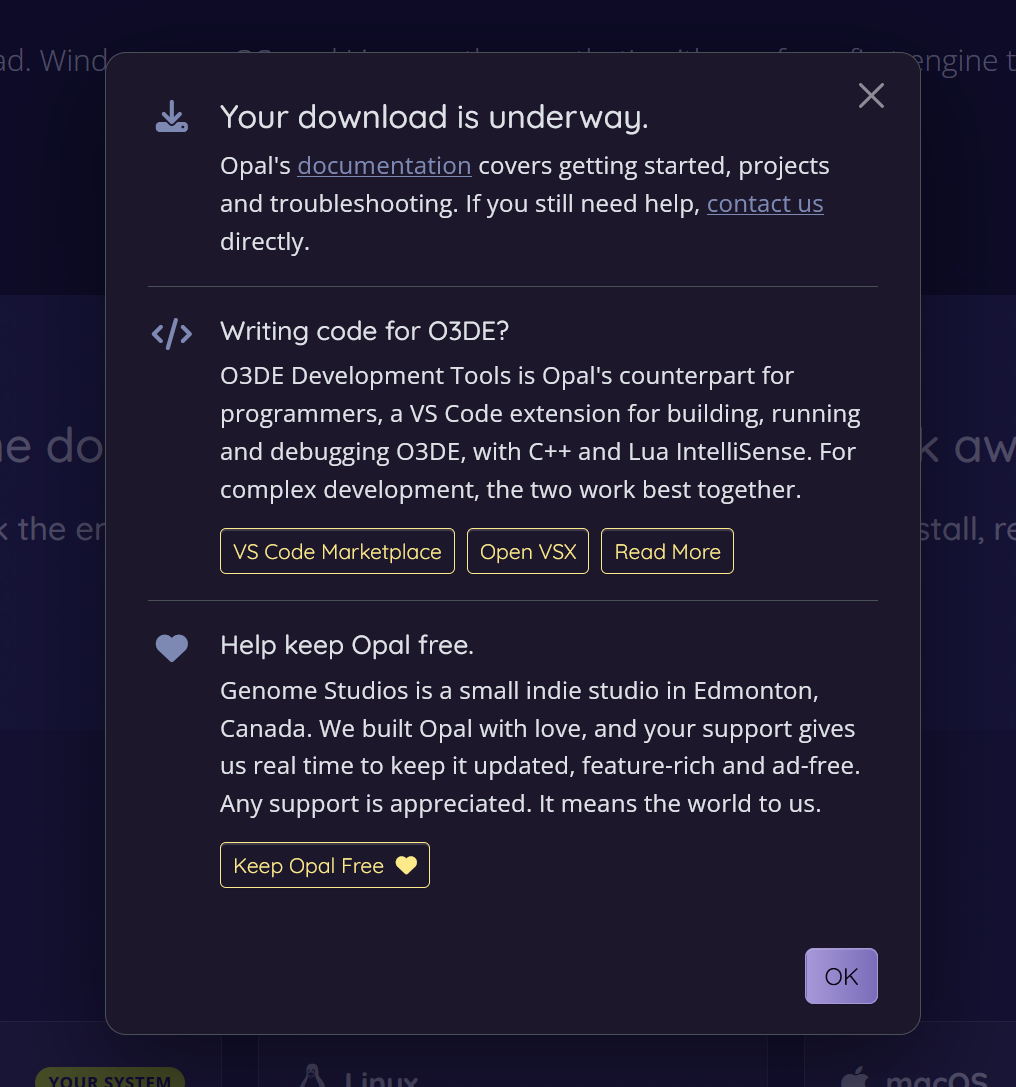
But still, even to the final moments, there were ways we could hone the site. In the last week, we were exploring the “post-download popup modal”. What should we try to provoke from it? How do we describe those segments without looking pushy, desperate, or purely commercial?
I returned to the site continually over the past 9 months, and every time there would be a nagging ‘something’. An anything that would just not feel right… So, thankfully, I wouldn’t gloss over it; I’d actually pull up the site project and chip away at it further. The line spacing, the colours of certain elements, the spacing of a single link or image… It was truly a real measure of fussing over every last minute detail that likely would be unnoticed by the vast majority of users navigating the site.
But, without a doubt, in its final form, those small fussy fixes all throughout the experience of consuming the site makes it that much more professional and complete.
Rolling back to the beginning of the month.
Entering the MyTanu rabbit hole..
Over time we’ve plugged at a few small side projects; low-priority things that are arguably more just a hobby experiment than anything serious.
One of which is a Task Management software, Tanuki. As we’ve tried to find free and open source tooling for all our internal infrastructure, we were also hoping to veer away from a dependency on Jira and find ourselves a strong equivalent.
Boy, were we surprised where; unlike pretty well every single other tool we’ve searched for that has had a potent, appealing, and feature-rich FOSS solution, there was basically nothing. Legacy tooling that looks like it was programmed in 1995 and never got a graphical update, gorgeous tools that looked feature-rich but ended up having 80% of the features just be “#” links. (Placeholder URLs that do nothing.) And otherwise, options with an eclectic mix of useless, terribly ugly, poor ux, and beyond to choose from.
Since we’re small, we’ve honestly been doing fine simply with GitLab issues, and personal responsibility steering us. But some of the features and concepts we ‘did’ find while searching around were really intriguing to us. Leantime, for example, speaks about making the tooling more resonant with neurodivergent developers and staff by playing into behaviour that makes certain activities, mechanisms, and methods more accessible to those sorts of users.
That really stood out to us, because not only does this industry get a lot of unique people, but even to someone fully gung-ho on board with task planning tooling, there are some arduous aspects that are just… ugh…
As part of us imagineering what “Tanuki” could be, I jokingly brought up Tamagotchis. More so, those productivity phone and work apps that have a small animal or mascot that your work efforts feed in some way. There was something about llamas as a major task-planning software I had encountered…
Enter the “MyTanu” Tanuki plugin
I hit a point where I just ‘had’ to experiment with this. I had this wild idea that the attributes of tasks, the frequency of completion, the scale of the problems could all be stats that would feed into your Tanu, modulating how they look, and showing off details of the type of work you’re accomplishing.
Quickly, however, it became clear that there were a LOT of holes compared to the loosey-goosey concept.
– Pretty well, any large-scale professional company using this will be predominantly specialists. This basically means every writer will get the “stack of books and glasses” tanuki, while every engineer gets the “CRT monitor and code particles effect” tanuki.
– It turns out that most of those productivity games and phone apps use “Streak” game mechanics. “How many days in a row did you complete a ticket.” But that’s actually a mechanic that is driven by negative reinforcement. By linking everything to a punitive streak, users are pressured into complying with a rigid set of rules regardless of their well-being, and having a streak end and crush their efforts in one fell swoop, it actually works contrary to our goals, which is to use positive reinforcement loops to make the Tanu fun and positive and to make having proper work and wellness balance a core result.
So I got to actually working on it very briefly and had to pivot with… kinda my whole plan for it.
I opted to use a combination of lifetime stats and a measure of “in the last 30 days” based measurements to provide modulation options for how a Tanuki would change in various ways. I made the Tanukis simply have customization, to allow the user to define their Tanu identity. The lifetime stats define a Tanuki’s specialization.
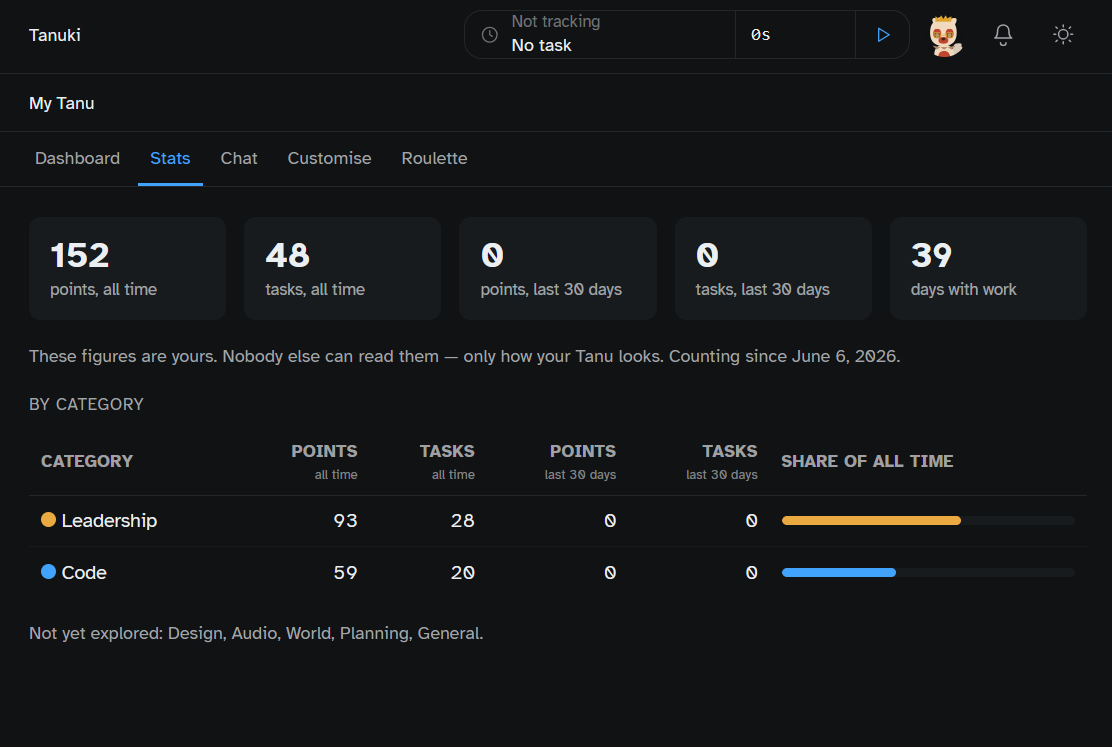
Thinking about writing this segment of the Month in Review actually kickstarted a better idea about how to add modulation based on the types of work being done in recent memory. Which is to make a separate axis from the category of the profession and into the qualities of a task that can be universally shared across any category of work. Urgent, spring cleaning, supporting, unblocking… I don’t have it completely fleshed out, but it’s definitely something I now want to experiment with adding.
(I will do this the next time I work on this…)
Now, leaning into the fun part of MyTanu
In my past work experiences, for team building and support, we’d have game giveaways and things like that, where we used a spinner wheel with names to pick the winner.
What was used was this super analogue site page where the names were on coloured wedges of the wheel; once someone got picked, it had the ability to respin the wheel, now with the previous winner removed. It was fun.
So I sought to replicate it as part of the Tanu plugin. With it serving as the “let’s be fun and light” portion of the task management.
So we got a Tanu spinner! Everyone’s tanuki goes on the wheel; you can spin and respin. You can populate it by individuals, teams, or projects; all fed by the software itself. The Tanus emote and everyone’s custom Tanus are used!
I honestly can just spin that thing over and over; it’s a blast.
Then into the GS_Central rabbit hole.
Hot off the heels of the My Tanu experimentation, I had another nagging little thing I’d gotten the itch to explore:
Even Genome Studios, as a tiny company, now has all these different tools and services at our disposal to, arguably, expand our capacity and quality of work through systems that aid us in the day-to-day operations.
This is mostly a definition of an ideal, as anyone who’s had to use productivity software in their professional work can attest: it more often than not becomes a rat’s nest of clutter and noise that ultimately leads to nearly nobody actually using the resources and tools at hand. Often to the chagrin of Producers who’s sole job is to keep the ship running, and people doing the actual important work.
So. What if we were able to clear out the clutter, get people ONLY connected to the things that are directly relevant to them, and then make it so anything else that comes up clearly and easily gathers their attention to address it?
So begins Genome Central.
The idea is: You, as a user, get the GS Central software on your computer. You connect all the disparate accounts you have for every separate tool the company has in its infrastructure. Then, GS Central has modules and widgets for every connected service that allows you to customize a dashboard with only the important fragments of a given service.
Git issues list, the status of an automated pipeline you’re responsible for, your punch clock, an upcoming meeting ticker from your user/events service… A Genome Studios information blast… A docs space or section for quick access to instructions or conceptualization…
I’m not totally sure of every piece of it, but again, to the idea that people all work differently: you can now configure your own dash to bring the most significant aspects of your job to the forefront, and then let the clutter and noise of the rest of the tools fade away.
Ideally, this means that users will be more interested in tuning or shifting their GS Central dashboard to make work as pain-free as possible… and of course, particular users can dive into the specific service sites and tooling directly as is necessary.
So in my excitement, I ‘Frankensteined’ it.
I copied the entire Opal project over, at the state it was at the time, then gutted tons and tons of it to leave only the generic elements I could leverage into making the new app. I then hacked out a grid dashboard tool we had in another project to make the dashboard.
Then it was the strange task of making a slurry of account connection options for each service we had. Some have advanced API’s, some use special access tokens, some have none of that and just need to be brute-forced with an account login.
Well, at the end of the day, we got your Tanu on the screen. Git issues and tasks, pipeline statuses.. All on a configurable grid-driven dashboard!
I couldn’t get much further than that, as we actually have work and job things to do. Hobby fun side project time is great, but getting actual work done is also pretty important, as bizarre as that sounds…
So, the taxes.. keep going…
After all the fun, came a nice big stressful slab of work still remaining on the taxes front. We were getting to the final motions of it, which was good, but also started to get to the committal stages of everything.
Turns out when you do a massive run of tax returns, you can’t rely on some of the easy processes that are made available for year-after-year submissions. In this case, you use the previous tax return ID to register the next year’s return. Because none of my taxes were actually processed yet, and therefore had no ID set for them, I had to actually call in to the CRA for a submission registration ID.
If you don’t know: phone calls in particular stress me out unlike any other mode of communication. Thus, I was pretty resistant to having to call in, give a very thorough indication of my ownership of the company, then ask for some gibberish code over the phone that carries my tax return to its final destination…
Turns out this particular process was staggeringly quick and easy, much to my surprise. You call in, press 2, the person answers in like 2 minutes, you say you want an ID for x number of tax years, they ask fewer questions than I anticipated, then give you the numbers. Took maybe 5 minutes. Afterwards, I was honestly suspicious of how easy that went.
Next on the Tax Chopping Block…
The scariest part of the entire process. Submitting the actual tax payment necessary to claim the SR&ED credits that this whole process was literally started for.
Absolutely, this was a good initiative towards actually getting the ‘entire’ company’s ducks in a row. Getting everything in line and above board is great, but y’know… it’d certainly be nice to get the rewarding part after all this emotional cost.
Went to the bank, gathered around 50,000 dollars, and then did the tax submission. Yikes.
Poof. The money was submitted, the balance is back to 0, and now I get to just sit in it… Now I get to stew in the whimsical idea of receiving a very cordial letter along the lines of: “Thanks for the taxes, you’re going to jail, scumbag.” As is totally reasonable and realistic to expect when doing anything related to money, government, and/or taxes.
Back to work, an Opal Sneak Peek
Heart attacks aside, I went back to work. It was earlier in September, and we hadn’t closed our schedule yet; because of this, I wanted to build out a feature in Opal that we REALLY wanted to have at Genome Studios. It was something we had in a random disparate application we made some time ago:
While Opal was made to connect to Official O3DE engines and can allow connecting to repos, it does not allow secure connections to private hosting of engines and assets. Something we absolutely need for internal development. Without a doubt, ANYONE in need of distributing built-in-house engines would need this particular feature.
This was a core reason why we wanted to build Opal; we can now see a direct production need like this, then immediately set forth to make it. Count this as a sneak peek of Opal 1.1.0:
So, you have your company server. You’re a smarty-farty, so you have it set up that your server can build a cut of the O3DE engine perfectly to spec. Now, you need to actually deploy it from the server to your team. This can be a complicated web of needs. You have engineers, likely to have everything raw and available in 20 forms; they are developing open-source work, internal source work… And arguably they want to see how their resulting work turns out deployed to the other developers in the team. You have developers and programmers; they aren’t concerned with the engine, but are developing C++ and scripting for game projects. They need the new bleeding-edge engine the moment it comes out; otherwise, they can’t implement this or that blocked feature, awaiting the new engine deployment. Then you have designers and artists; they aren’t doing any of that stuff; they are working in the editor only. They don’t know or need to know about the fussy details of the engine and game system development; they are consuming those things to make levels, cutscenes, puzzles, combat sequences… whatever it may be.
O3DE is made to satisfy the incremental needs of a production like this. You can provide source code, provide engines built with only the engine tech alone, you can build an engine with the engine tech, AND your custom-made gems and tools. That way, you can ensure the people who are using any one of these engines get exactly what they need, and as close to fully-built as they can get, saving tons of build time over a dozen users.
This then shows the definition of needs:
– You can’t just make a single engine and give users a link to that. You need to provide a catalogue.
– You’re continually pushing updates to engines, and unless you have a freeze at your state of production, expect users to be able to pull up the newly-fixed engine.
So I set forth to match exactly those needs. They were already proven in our original application, but we now needed to integrate it into Opal and the backend that Opal needs to work stably.
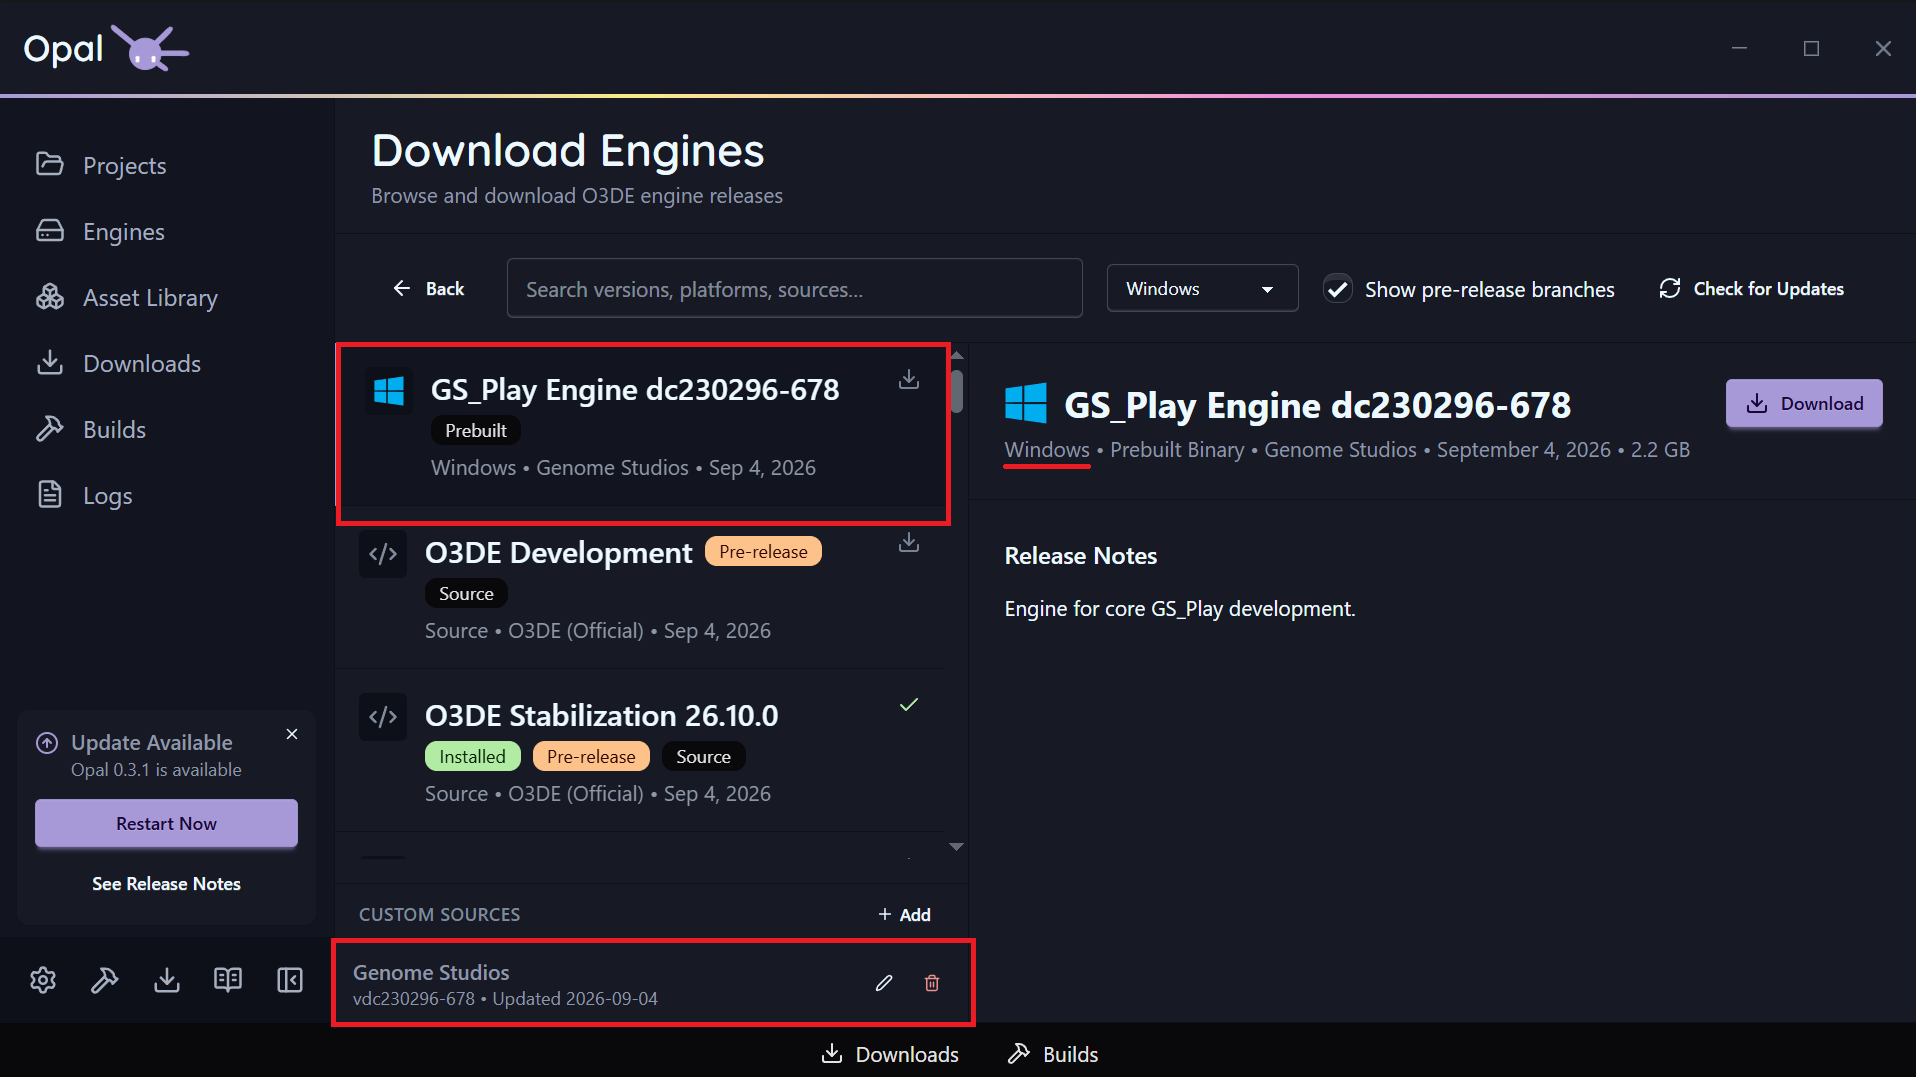
When you build an engine, it actually outputs a folder of files. This is considered the “built engine” to work with. When the O3DE organization releases the engine, they actually proceed with a second step to wrap the loose files into an installer. But ultimately, the installer just works out where to copy this folder of loose files and make them findable on your machine. This means, though, that you can continually overwrite this folder of loose files and the outside system has no need to know.
We used this to our benefit, utilizing a “Delta” system. When you build an engine, if you have a copy of the previous engine, you can compare the changed files: which ones were added, edited, or removed.
Using this catalogue of deltas, we can ship a complete install package, as well as a much smaller patch package alongside it.
If you then have a system that can read the patches, relative to your local machine’s copy of the engine, you can properly add the patch and clean abandoned files as per the delta list.
The effect is that now you can place an engine, register it as “Artists Engine”, and whenever a new Artists Engine comes down the pipes, the artists can select [Update], and the engine is renewed, but every link to it remains untouched. All the projects continue to point to it, the O3DE manifest (a file that catalogues everything related to O3DE on your machine) continues to carry it as an engine, and all you need to do after is build your project to bring it up to speed.
Talking about the artist-side engine, this can condense the actual deployment + build effort into seconds or a couple of minutes, as everything, even the internal gem features, are prebuilt into the engine, making only a tiny bit of the system need updating at that final project-most side.

Into the benefits and follies of “Brute Forcing”
So, this process, and a handful of others I’ve undertaken, have been under the context of me “Brute Forcing” the effort. This means I essentially vibe code a horrifically messy and inviable implementation, essentially what the “work fast and break things” philosophy captures.
You are hacking together features from other software, you’re forcing libraries and functions that aren’t yet installed in the codebase (authentication), you’re usually missing code compliance standards, missing premade widgets, ignoring localization tagging… basically none of it can actually be used.
However, this is where the “benefits” part of the follies come in.
Doing this, you expose holes and unexpected details in capturing the feature set as a whole:
Where do you put the credentials, what is a secure-enough connection, where do you put the input fields, what is the data you’re going to use, can any of these processes actually work in reality, what are the potential failure points and warnings?
You don’t necessarily know any of these bits until you’re piecing the chunks together into a single final experience. At the end, you end up with a target for a complete representation of the process and user experience. This is the minimum standard expectation for how the system needs to play out. It allows a powerful prototype to wayfind to where before, there was only a specification and speculation. Valuable gain, and done in a fraction of time.
And we do get something in the end.
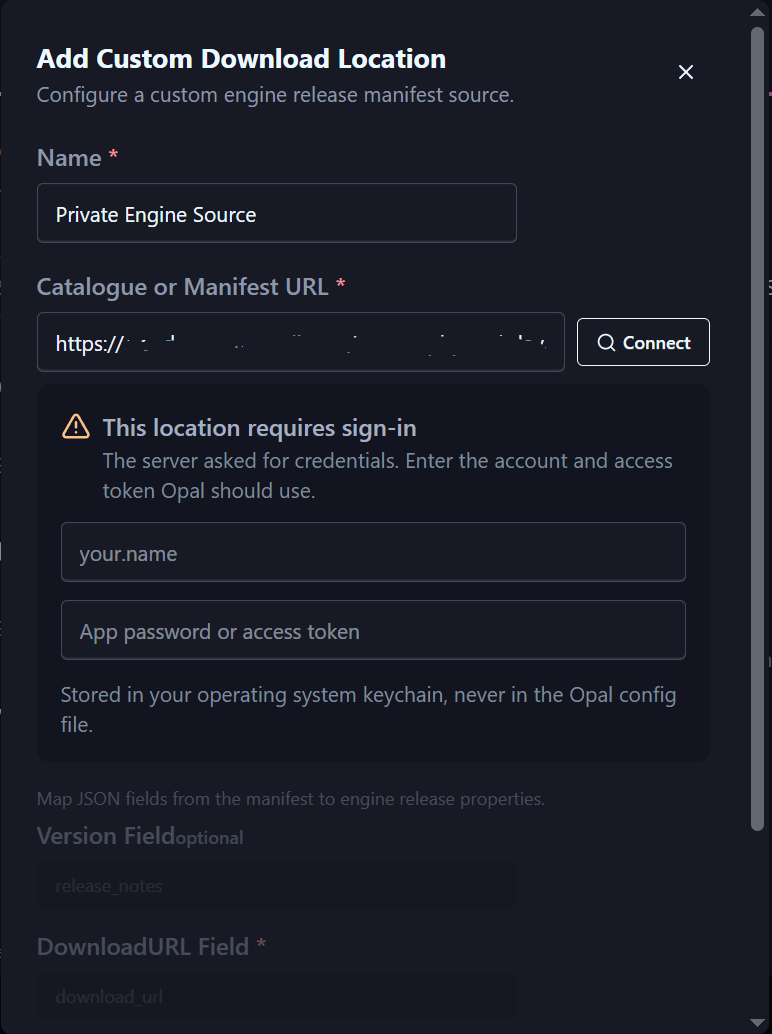
So now the folly part of the follies…
Basically, every loss captured in what I wrote above- the non-compliance, the hard-coded widgets and modules… Everything captured functionally is a mess, and underutilizes what’s already there and ready to use. Actually proceeding to a functional system that’s competently implemented involves a ton of review, reworking things, dropping concepts or systems in favour of a stable and more functional library or tool.
All of which has to mostly be built from the ground up, only referring to fragments captured in the brute-force implementation.
In the wake of my messy, chaotic madness features, we’ve begun to tighten our practices around these processes in hopes that we can pin down more concrete outcomes sooner, in order to remove as much of the overhead of translating… “Soft-Forced” features in the future.
I wouldn’t argue against the brute-forcing; it’s helped in an environment where I’m not remotely as familiar; using rust, and developing software in general. But this is where the issues of engineers being inundated with code review and not getting any of their own work out can be significantly exacerbated.
I’d say, it’s best to try and dampen as much as you can as the brute, and only funnel the higher difficulty, more critical aspects to the engineers for a final review.
Deeper into September, the Legal… Keeps going…
The bills came due. Ooof. Good to have the work done and concrete, but wow, I should have been a lawyer.
Had some last things to get signed and packaged all together. But thankfully, the legal stuff seems like it’s going to simmer down a bit until we start kicking up more business again in the future.
Planning out the Opal Release. We didn’t know when we were going to pull the trigger.
We knew we were getting into the final stretch just before we could actually call Opal ready to do work for other people. It was a rewarding feeling. Just chip a little more, then we could actually think about how we were going to release. But when that would be was still kinda.. ehh?
But we committed to the final stretch.
The site had to finally be pinned down and look ready ready, as I had alluded to earlier in this blog. We had to finalize the documentation, read it all through to make sure it was concrete and descriptive. Get all the supporting images and screenshots.
We had to shift from feature development, all that fun stuff around brute forcing cool tech, into quality assurance and actually shaking out every last issue.
An interesting struggle with this particular work is that after long enough, and when your workflows are a specific way, you start to become blind to certain features or mechanisms. Because of this, we would be all confident that pretty much everything was working out, then realize we have not done X, Y, Z in months (because why would we need that?), and after giving it a try, an explosion of new issues we haven’t gotten on our radar would pop up.
This was where I had to start participating in a controlled, non-brute-forced manner and actually contribute fixes that should need minimal correction after code review. It was whack-a-mole, and I couldn’t just foist the fixing job onto Shauna, our lead on Opal, while I JUST do QA.
Because: “Let’s add export, 2 seconds before launch!” came in hot. Which meant she was already busy with bug fixing AND feature dev.
We made this choice, which many producers would argue was a horrifically bad one, because we wanted to have a particular sell to Opal right out the gates: “You can start from nothing, and end with a fully released project.”
We have, so far, only implemented the basic export, which is largely not able to release complicated games. But it sets the precedent for Opal as a complete solution for the management side of your production.
All of which did, in fact, get implemented, and stabilized fairly quickly and fairly well.
Next on the chopping block: the O3DE Dev Tools Extension
I quite regularly spin off in my personal time into superfluous projects and work, and rearing its head this time was my O3DE Dev Tools for VSCode.
People were having really dubious ability to use the IntelliSense that was implemented in it thus far. It was restrictive, low detail despite my efforts, and really struggled to actually make the proper links to code.
Part of the struggle is that the engine you’re using, if it’s prebuilt, doesn’t actually HAVE the source and functions and events and things exposed. So a critical part of the workflow is to have a “surrogate” source code engine as part of your “VS Code workspace”. The IntelliSense then scans the headers that are shown during the project build, then routes the IntelliSense to the source engine equivalent. There is certainly the possibility that your engine and source are massively different, but that’s a ‘you’ problem.
This time round, I expanded the possible options. I really prefer making opt-in options that allow you to either work with what you’ve got, or shift things around to what you prefer to have. In this case, clangd, now serving as the IntelliSense driver.
To serve the entire IntelliSense system better, I broke it out into its own section to expose as many configuration and status details as possible.
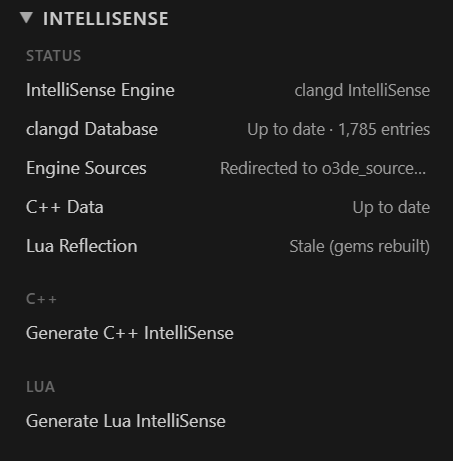
You can now select your IntelliSense driver (engine), target the source engine specifically so it actually points the refs correctly, review the C++ and LUA up-to-date status, and trigger IntelliSense generation. All collapsible to be out of view when everything is set up and working correctly.
Of course, there are always more issues and other features to make. Ain’t no rest for the wicked.
Cue The Opal Demo Video…
With the export feature in, the one last unclear element for the Opal release was the Demo Video.
I am familiar with making video content, doing voice-over, and editing. Nothing about it is outside the realm of possibility. However, I have also not made anything like it. A short, sterile, direct, and simple recording of Opal features and function, all following the path through using Opal with the extra little bits and bobs like the debugging and settings…
Ooooooohhhh the Opal Demo video…
So I set forth. I gotta do it at some point; I might as well rip the band-aid and just get it doing.
I create a new user on my computer, set up the environment precisely for the video recording. Basic paths, clean desktop, background, complementary Windows theming. I expand the mouse cursor size for easy legibility… I am doing everything I can to make things clean and crisp and make the video as easy and manageable as possible.
I even went so far as to get Opal running without entering past the EULA and Wizard (which locks the Opal window completely), and used Windows keyboard movement and sizing key commands to size and position the window in the middle of the screen. Something you can only set (from a fresh install) once you’ve progressed through the setup. Something that’s no problem for a user, but detrimental to the presentation of the video.
But with that, I laid everything out.
I already had the script, so I was able to record my voice-over and also plot out my chain of actions. Thankfully, the voice-over is very deliberate, so I was able to just record it blind, no need to match it to video, or do it live alongside the video recording. All you do with the recordings is fragment them into statement-beats as individual files. This allows you to pace the progression and pauses of the voiceover with the video exactly as the final video edit plays out. I am pretty good at this type of voiceover, so it worked out very easily, even with some impromptu script changes as I realized the progression wasn’t working out or detailed enough.
But ooooohhhhh, the Demo Videooooo….
I begin the video recording…
Before I get into the horrific details, understand that while I set up static parts of the Windows environment, there was also the Opal-specific setup that needed to be done to make sure that Opal plays out as closely to how it appears from first install. This requires completely wiping Opal from existence, then setting up every piece just right so I can begin the demo looking fresh and how a new user would expect.
Next, I set up my OBS recording. I want to make this clear and high quality, so I mess around in the settings, changing compression methods and formats, file types, resolution, framerate… whatever I could discern would help make this video solid.
I had the resolution for the demo lower so that the footprint of elements within Opal would be a bit more generous and legible. It looks great at 4k, but is, obviously, far smaller and finer in detail.
Recording works out well enough. There are points where I purposefully left the recording to record despite the time to actually process, like the project build and export, to play out naturally. Ready to be spliced together and skipped in the final edit. During the recording, of course, I move the mouse kinda weird here and there, pause weirdly trying to remember what is next… stuff that’s fine to go ahead with, but certainly nags at me. At one point I hit a bug that seems to make it so a certain install can’t actually successfully build. Not sure why, but I gotta just work out the video and move on. A new take, and everything is working out all the way through. Took maybe an hour.
So I get set up in DaVinci Resolve, ready to just grill the video through and done. Easy peasy.
If you aren’t familiar with video editing software, it’s usually recommended that you set the preview window to the lowest resolution, as the video can chug when rasterizing live as you edit. Something important because when you’re timing voice clips, you can’t have it stuttering through playback… otherwise, you can’t make the audio line up at all.
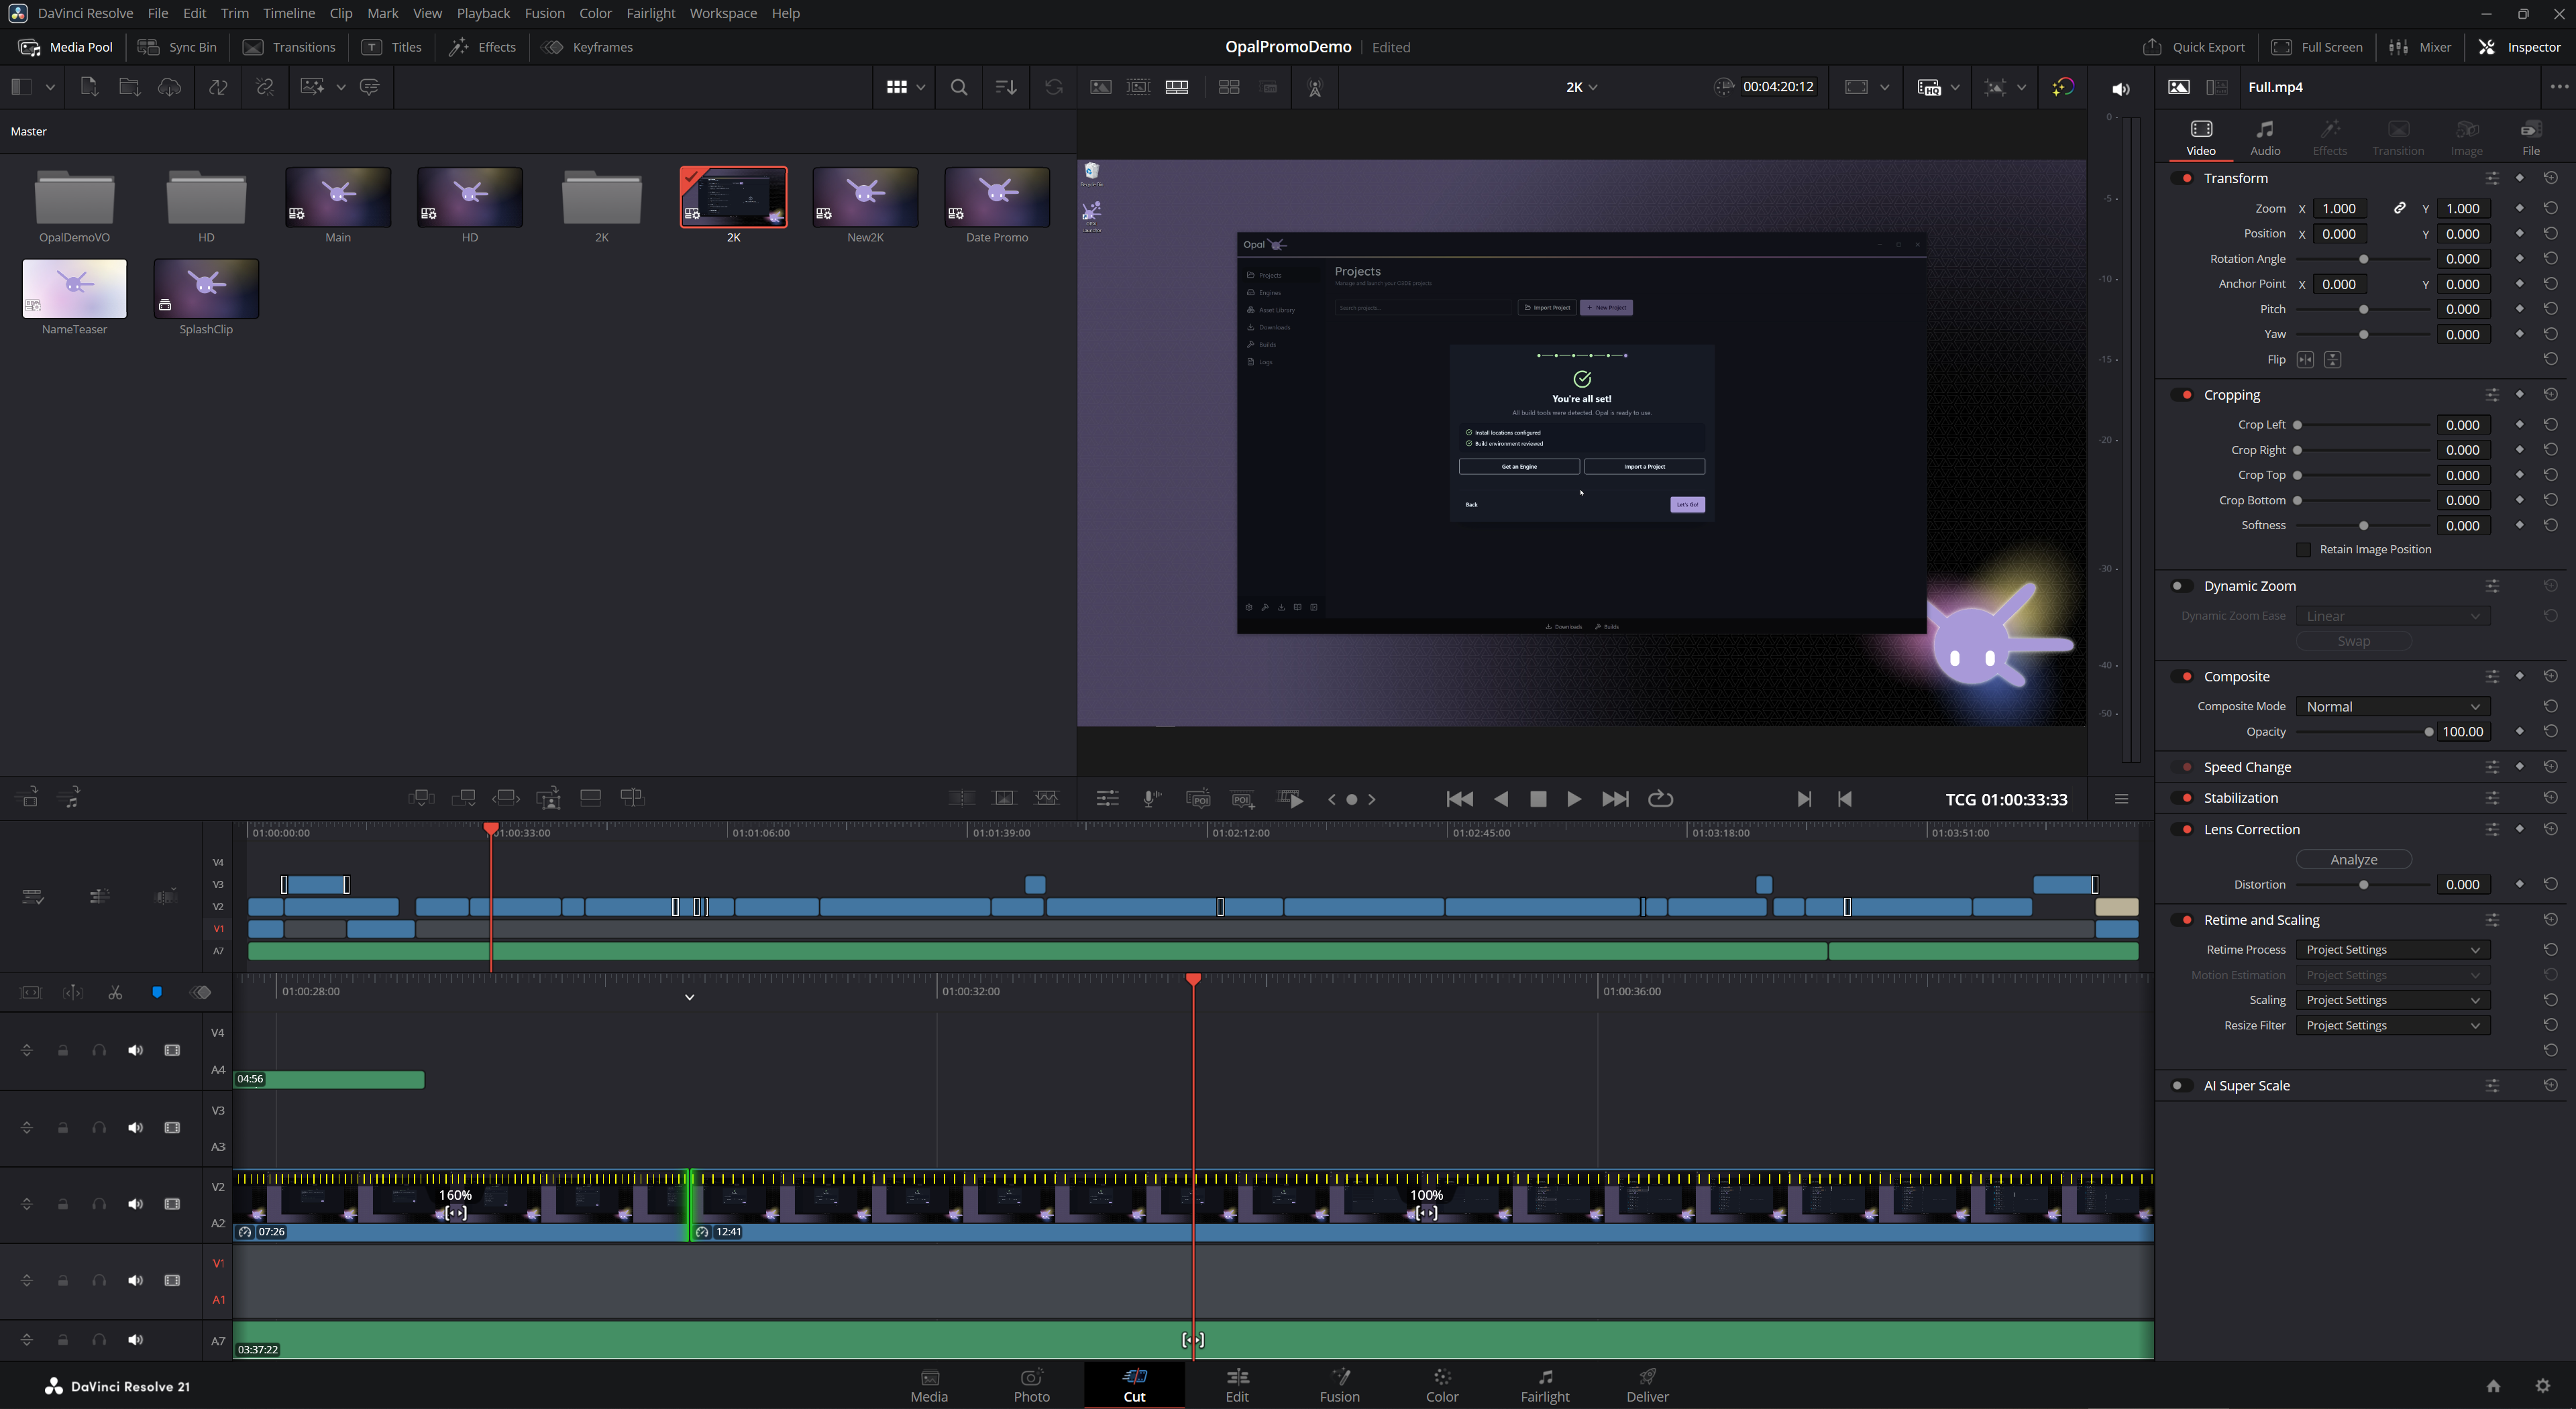
Working out well enough. There are some aspects of DaVinci that make me absolutely livid. The slice clip button cuts through the entire project. Slicing stacked videos, slicing audio clips, slicing the music… I have no idea why that would be the “default” someone would want, when any other time I’ve ever edited in video editors, you are addressing one clip specifically for your current editing.
Then, transitions/blends… WOW, those things are aggravating. You HAVE to have fades in-line, even when you want to transition out of a clip into another one in a different track. I had to fight with that to the absolute bitter end… I still don’t have any confidence in using that stuff in later video projects.
Last most aggravating thing… As far as I could tell from online: Composites; Sub-Videos you can compose in the master video; are supposed to be able to be created and edited… Something I love to use for modularity and reuse. I used it for the Opal Title segment, which I recycle at the end as well. Wellp, you can select a section of video and create a composite with it… But after that it’s donezo. You can’t break it apart; you can’t edit it inside… If it’s not what you wanted, you’re locked out. I can only assume that’s part of the premium version or something… one feature which kills me they paywalled, as it significantly ups the “uselessness” stat of the software’s free version.
I can’t complain. It’s very capable, and they are generous to make it free.
But I made it through! Demo Complete!
Time to review and get ready to upload to YouTube!
But for some reason my VLC is playing the video at a really bad resolution. Like. None of the text is particularly legible; everything looks foggy/misty, and overall really bad…
No… No….
This was an upscaled video from 1080p to 4k, this is not how it should look.
It was 720p. The recording was set to 1080p and to output at 720p, a second resolution setting I had missed in the OBS settings. This video was 720p being stretched to 4k. A 16x scale-up… That explains the fog, the complete inability to read any text…
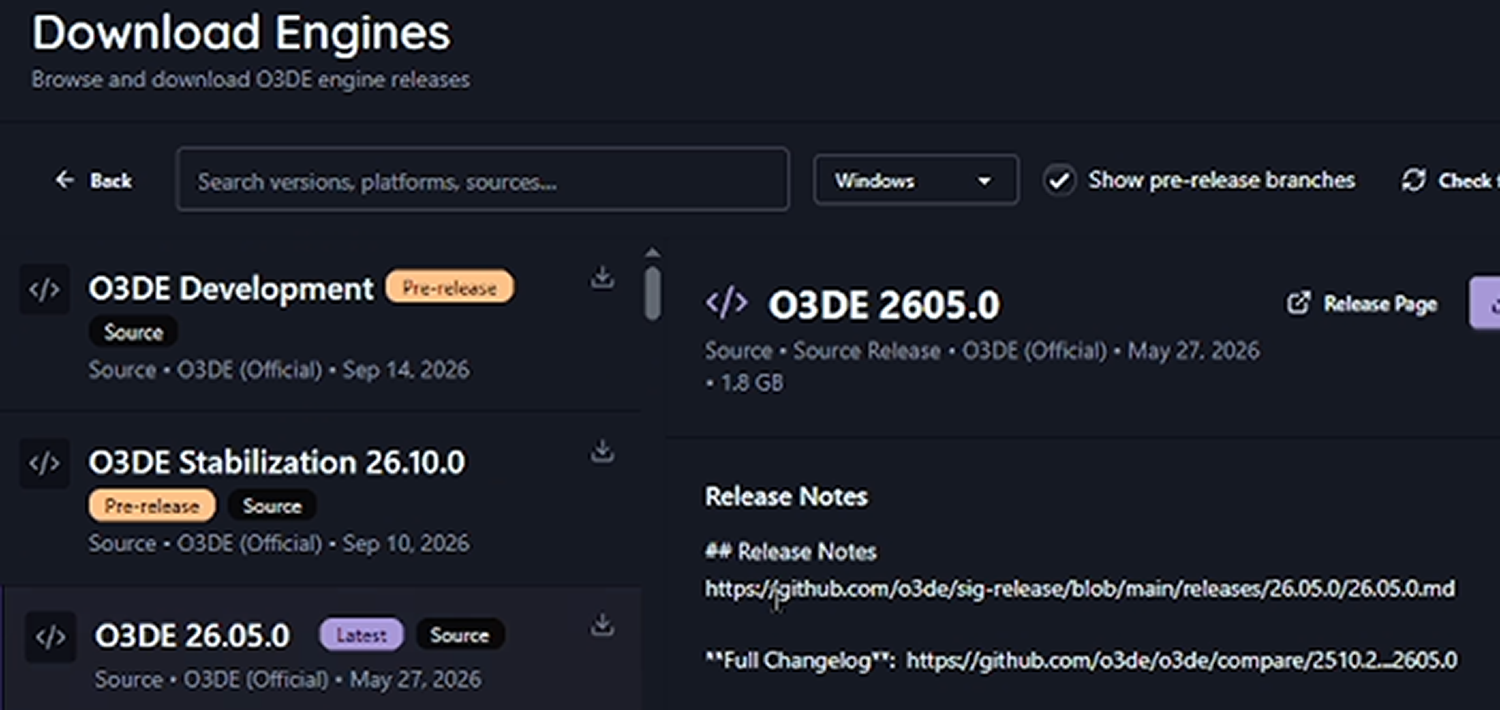
I botched it. I had already been seeing the resolution issue in the preview of the video editor… I had simply assumed that was the 1/4 size resolution setting to make the editing faster…
2 more hours down the tubes. That makes 3 total…
Alright. Gotta be a professional. It’s a setback, but that’s okay. You just pick yourself up and tackle the thing head-on. I JUST need to make the video. Anything on the way is simply part of the process.
This time, I’m not going to mess with resolutions, not going to do some weird scaling this and scaling that. I’ll record at 4k, let the video be crisp and pleasant and just work with that.
I set up the OBS settings, CHECK TWICE THAT THE RESOLUTIONS INPUT AND OUTPUT ARE THE SAME, and proceed to record.
This is a great opportunity to fix up the weird mouse movements and pauses, time out actions a little closer to the way I had to edit the original video; making pauses where I moved too fast, moving sooner where I was paused for a painful length of time.. good. Way better to work out those gritty details and do a cleaner, more practiced effort. I already have the voice clips placed, and can literally match the clips to the badly rendered ones on the tracks as well. Half the job is done already.
So I set forth to record; reset the environment, reinstall Opal, reposition and resize, and get everything just right. This time I recorded the full process easily. I’m feeling good. I can already tell the recording is cleaner and more precise. Took an hour after everything: OBS, reset, and recording. Ended up getting through faster. I think I might be able to shave off some time in the final recording too, which is good as the demo is meant to be short and sweet to keep people’s attention.
This time the video looks crisp and clear, even in the editor preview. It definitely has a harder time processing, as it’s working with a significantly larger video file, and sometimes two stacked on top of each other and stuff. So as expected, it kinda skips here and there. But nothing that caused too much trouble.
Got the video done, and I managed to get it shorter! I also had a better time making the transitions this time, both because I figured it out a little better, but also because I paced my pauses in the video way better on certain parts.
A real fuss, but I made it through! Better and badder than ever!
So I review it one last time before I upload it to YouTube.
The video looks crisp and clear, I did it right this time!
But the video is skipping. Like my mouse is jumping lengths, and then I see button clicks or actions being swallowed in a stutter…
No… NOOO!!!
I BOTCHED IT! OBS couldn’t record fast enough at 4k and so it would record, max out, skip data, then record, max out, skip…
AND I SAW IT IN THE PREVIEW OF THE VIDEO EDITING! I JUST THOUGHT THAT IT WAS SKIPPING BECAUSE THE VIDEO WAS SIGNIFICANTLY LARGER AND SO IT HAD TO WORK HARDER TO SCRUB THE VIDEO LIVE!!!!!
NOOOOOOOO!!!!!!!!
6 Hours Now…
Alright. I gotta be a professional. I can’t have this video project I’ve now easily completed twice drag into a new day. I have it practiced well now; I’m familiar with the editing process. I just need to do the proper job of ENSURING the footage is ACTUALLY viable.
So I start fussing with OBS, can’t seem to get the settings right. The video keeps skipping. So I do research: how can I maximize the configuration to get high-quality… but actually working recording?
Found some discussion around it. Discovered a wealth of advanced settings I never knew existed. Brought the resolution down to 2k, which is a totally fair: 2560×1440.
I record some new samples… things are actually looking like they’ll work… Of course, I’m not running builds and moving my mouse around and actually using the other software running while recording… I can only hope and pray…
I record, and the recording goes well. Again, I refined certain steps that ended up a bit wonky from the last recording. I also increased the pace of a few things.
Well, with how much testing I had to do with the video recording, all the speed gain of recording the 3rd time got eaten away by another 1 hour recording cycle…
But things look alright; I checked this time.
So I edit everything together. Composites give me a hard time, transitions give me a hard time… but I reclaimed a whole minute and a bit, over the 50-ish seconds I gained from the first video. So, all things considered, I got probably the best result of the video.
For pacing I ended up needing to use a lot of speed-ups and slow-downs in all 3 versions of the video. This is the real benefit of having broken the voice-over into pieces, as you can then get the video playing out crisply and with easy-to-digest timing, then adjust the placement and pauses for the voice-over in response. Obviously, the timing I had for the 2-minute longer video would not align with the final 4:19 minute video.
You guys… IT WORKED!
IT WORKED THIS TIME. IT ACTUALLY DID. No takebacks.
It took me 9 hours. 9 hours to do a 3-hour project… I hope I never have to learn that lesson of checking my footage ever again. This half killed me.
I have to say, I’ve never been so cool with so many hours of setbacks. I was on a clear mission, and I would simply execute on it… No matter what…
Okay, no more stalling. Let’s release Opal. The clock is now ticking.
So, I had this grand idea to pace out our launch, give us enough time to work out kinks in the system, give some cycles for hype and promotional materials. But now that the video was complete and on standby, Opal was already feature complete in order to MAKE the video… I didn’t really see the value in waiting. We’re only in the middle of the month; that gives us time to fit in 2 weeks of a few promo posts, and then we get to the release before people get bored. Simple enough.
So we set the date. End of the month, then we will be shipped! A very prideful moment, and finally the time we get to show off our secret work that, throughout these past months, made us want to scream, because users were talking about and asking for SO many features that Opal was already solving at the time of their messages of concern.
Especially when Games From Scratch covered the GodotHub Project Management Tool.
Time to get serious.
During this last window of time, we were now in the stage of pinning down final decisions for everything. No more leaving things “almost there” or “I’ll do that after…” We are now aiming to make everything shine, and show off our absolute best effort.
Over the past couple of months we’d been working out our distribution pipeline. The process by which we commit our newest version to git; then our automated systems build it for windows and Linux, create catalogues and meta-info to properly identify all the pieces inside our release; to then put them into our public file storage (CDN), and make them available for the site to pick up and allow you all to download on the other end.
We had to decide what would be shared, what sorts of increments… all sorts of small fussy details. We resolved to display Major and minor releases, the #.#.0 releases. Then allow users to update through Opal to get the latest point release.
This was because…
Windows requires you to pay to sign your installer applications.
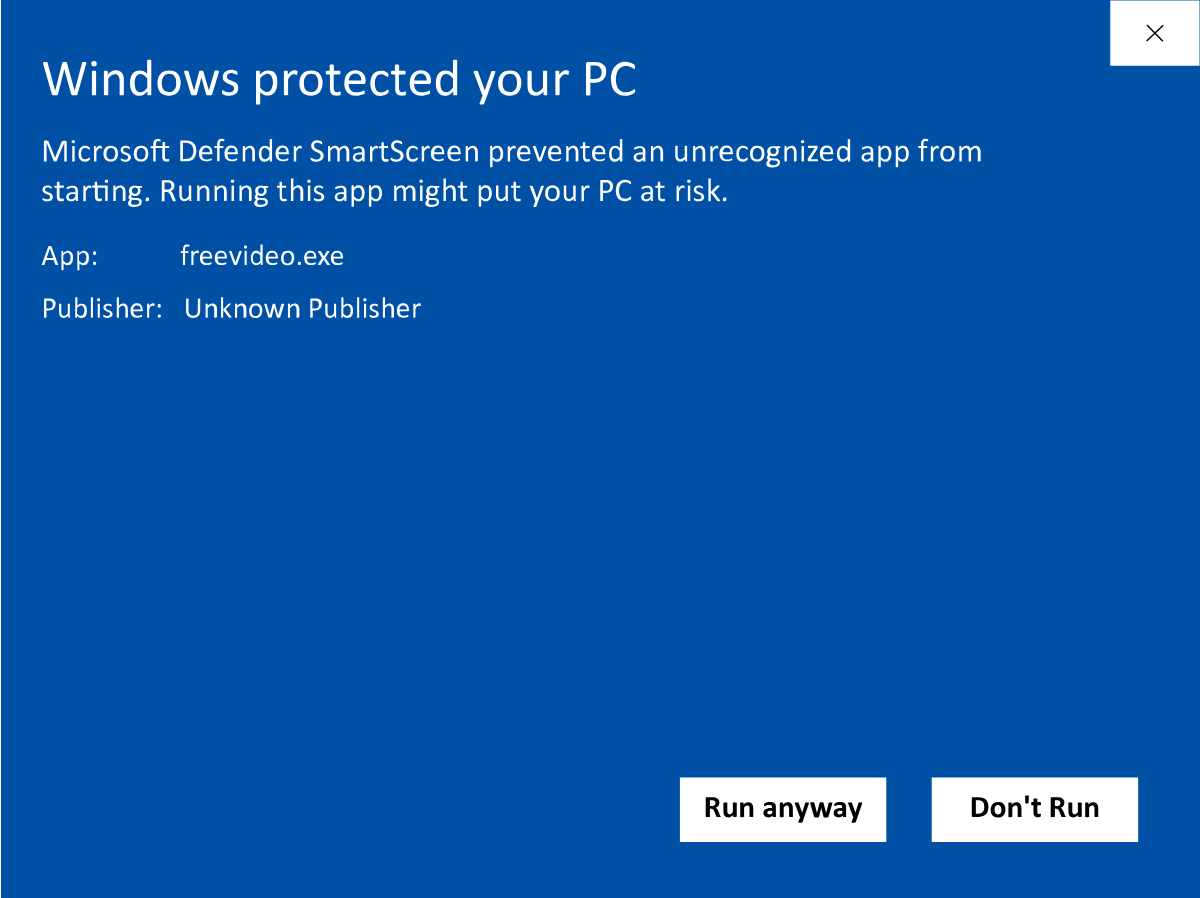
Yes. So there are ways to get.. let’s say, “validated” as a non-suspicious software and company. Most of them require reputation-based proofs that usually gravitate around having multiple thousands of installs over some large amount of time.
The smallest scale available was using a Windows signing tool provided by the Microsoft Azure management system.
I’ve known Azure to be a sort of tool/library to use in actual applications. Software… but I have now found out that it’s like… This entire Microsoft service provider portal that covers hundreds of tools and systems related to Microsoft and Windows? It is a DIZZYING fractal mess of systems and accounts, and sub accounts, and sub systems, and sub system accounts, and account sub systems, and account to system binding systems with their own accounts that have systems that need your other accounts and…
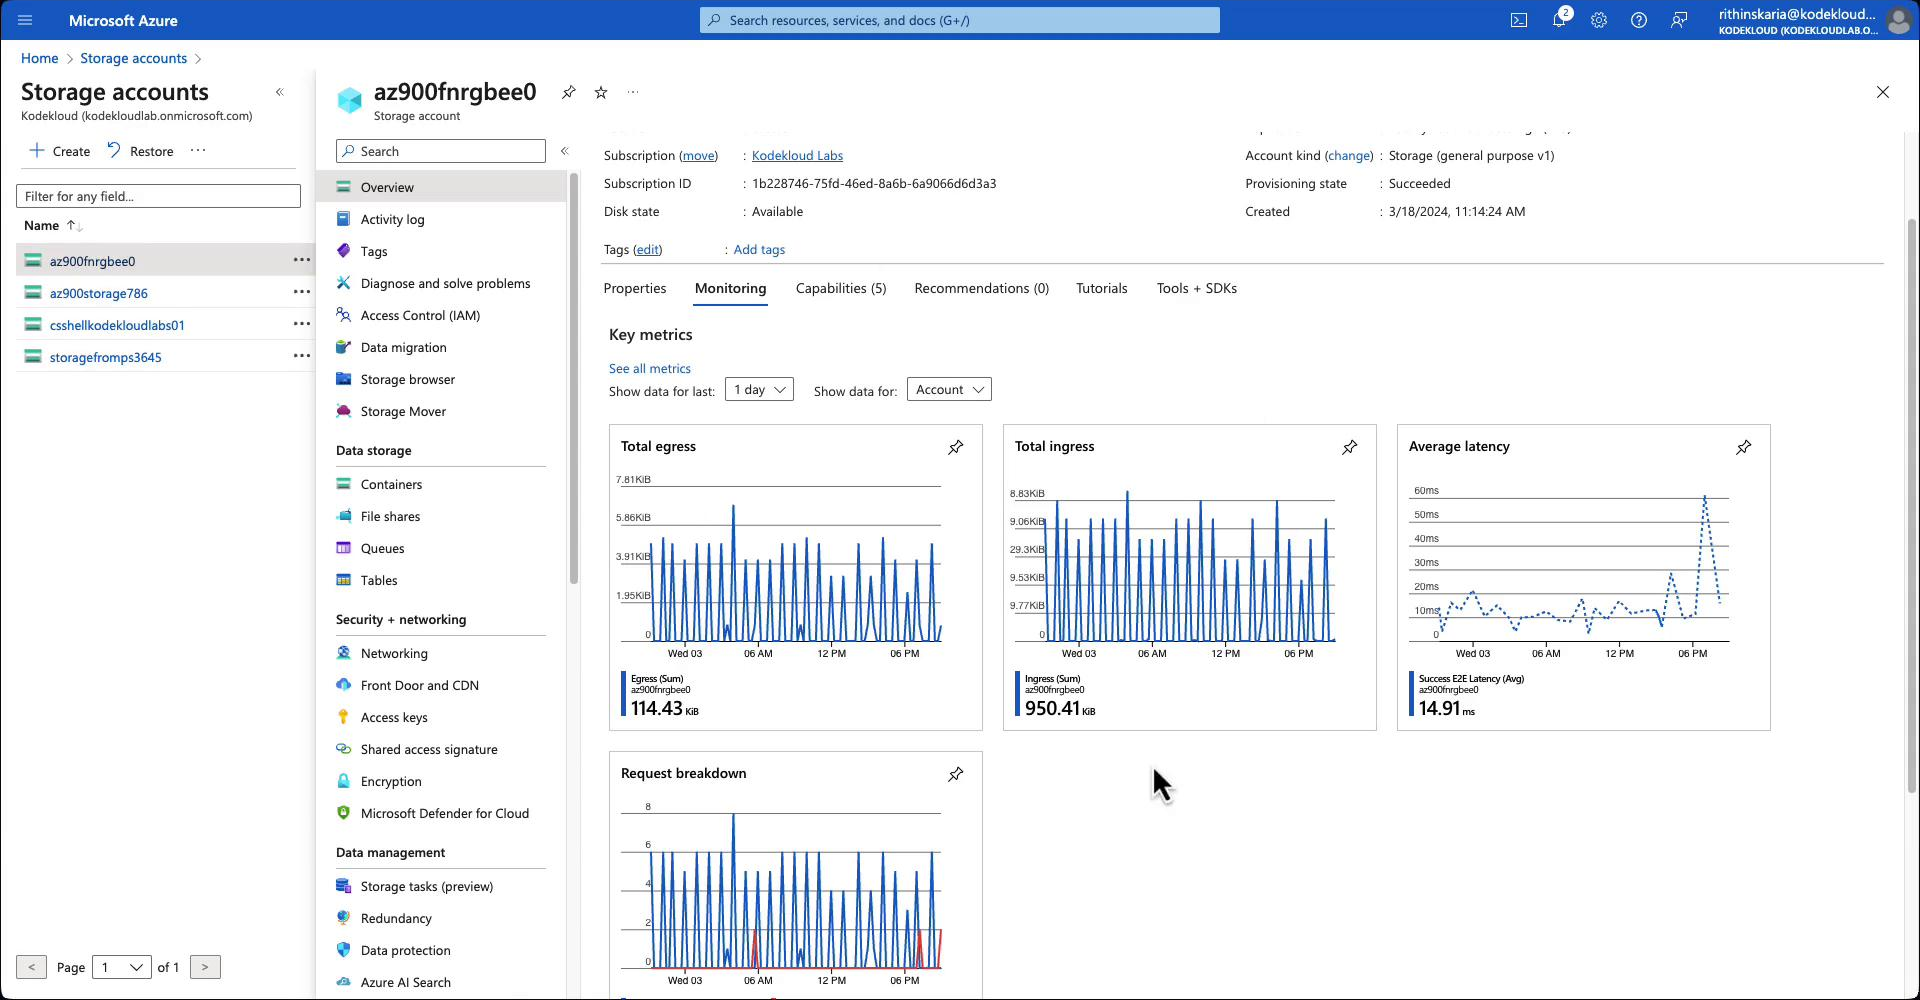
I hope it goes without saying that I immediately hated every moment I had to spend on Azure. I have never been made to feel so uncertain and lost in a service/tool in probably my entire life. It was clear to me that there are probably people in larger companies whose SOLE job is to navigate Azure systems… A job I can only assume makes you completely mad.
Okay well… We are doing the ENTIRE Opal thing right. No compromises. So I set forth. The premise is: “You can create an account to sign your applications; this costs you 10 USD. Then, when you have made your release, deactivate your account, and you can no longer sign your installs until you reactivate and pay again.”
This means, in our distribution plan, we would sign the available installers from the site. Then make the point releases unsigned, because there’s no warning or issue updating your already installed Opal Launcher. Being a small and broke company, this works out well enough, and we can always launch the signing account again to hit our next exciting releases. Like our juicy 1.1
So it begins… I had to make accounts for this, accounts for that, bind accounts to other accounts, register my company, register myself, personal documents over the portal… No, not that setting. You should have permission for “mmm”, no? Set permissions here; you should see “mmm”, no? Register “mmm” to “mmm”, then activate “mmm”, and use it in “mmm”. Still can’t see it? Oh, you used “mmm”, not “mmm”, so just “mmm” the “mmm” and “mmm” it to “mmm”.
This was probably the worst part of making Opal, by a large margin.
After 2 days, I managed to get everything set up. Our Opal was building; signing seemed to be happening during the installer creation stage of the Windows build…
I launch it and…
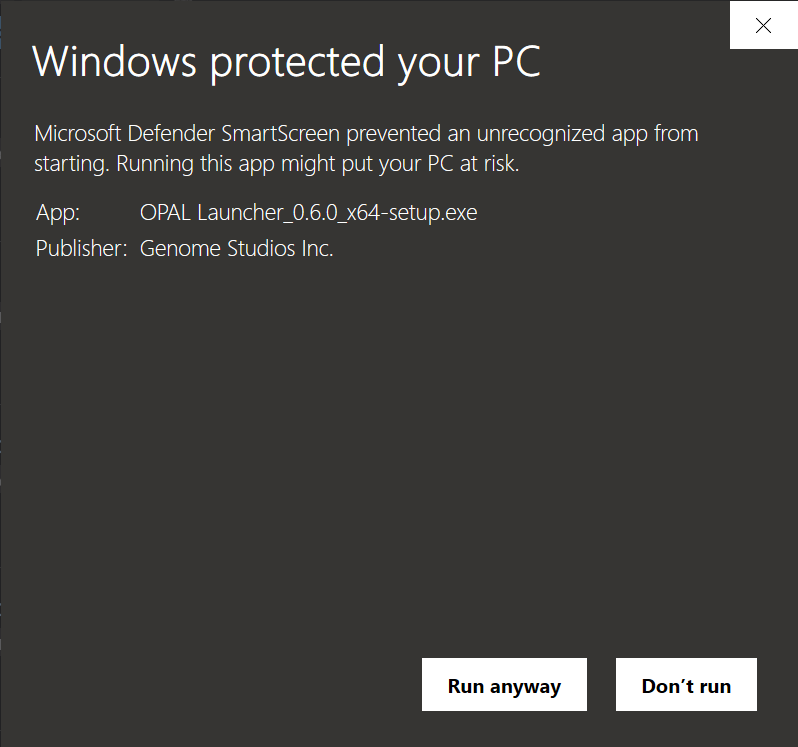
Oh… We are still a suspicious company and software… now you just get to KNOW Genome Studios specifically is not to be trusted… Great…
So I had to update the documentation to reflect this little confidence-crushing step in your installation process…
And the only way to get rid of that warning altogether is to…
Have multiple thousands of installs, over a lengthy range of time…
UGH.
Just… UGH…
And then, I find out. You cannot deactivate the signing account. The only thing you can do to stop the billing is to completely delete the account altogether… So now I’m on the hook monthly for a service we’re only going to use once or twice every few months…
Azure…
I’d rather be in the layer of hell where I have to edit my demo video for all eternity than the one where you have to use Azure as the only task for all eternity… That’s probably the deepest layer altogether.
So you know how everyone loves doing documentation instead of fun things?
Well… O3DE 26.05 is coming out any minute now, and it’s the first release that’s going to feature the super max ultra powerful Class Creation Wizard!
And so I found myself REALLY PROBABLY KINDA SORTA… needing to actually write the documentation… The class wizard is a fairly complex system, and I totally just vibe-coded it out. I am a game developer… not really a software or Python developer… The only reason it gets a pass is that it’s a standalone tool… and through extensive testing it does actually do everything I claim it to do.
But complexity, and then months passing, I was pretty unclear as to how to describe anything about it really…
Well, I have already pinned down a pretty decent workflow towards documentation. Capture the bulk of it through agentic reporting of features. Scrutinize and edit every page for precision in terms of purpose and functionality. Place images, ensure abundant cross-referencing to pages and features…
I then had a brain blast, remembering that there was in fact a “Developer Guides” section outside of “User Guide”, which is where far more complex systems and instructions exist. Separate from the more beginner-friendly documentation in User Guide.
This ended up working out so well. I could capture how to use it and provide simplified explanations for what it is capable of doing. And then shoot out a ton of links to the Developer Guides which show you, with high granularity, exactly how to utilize the complex underlying systems for fully custom effects. The fully custom portion being the most staggeringly powerful part of the whole system, parts I want to see how massive studios utilize, in order to see to what extent this system can reach.
By the end, it was descriptive, well organized, scoped far better than my first drafts.. I could say they were doing the job. Good, because I had to wrap soon enough and work on other things.
But then, alarms going off.
Class Wizard issues keep cropping up.
One of the biggest complications in running the Class Wizard is that it needs to utilize the O3DE-installed Python. We specifically upgraded it alongside the Qt6 expansion that just came out, specifically in order to have everything upgraded to use the same package.
But targeting that package? It’s been a complete mess.
I already had dozens of stopgaps, and immediately in the hands of other users, it falls apart. Bootstrapping is what it’s called. Setting up the Python environment by nearly any means necessary.
Then the Wizard was failing to target the project and the engine together, making the in-Editor button fail…
Then, there were small issues in a few of the new templates…
It was just on and on little nuisances that… were big enough to warrant an absolute need to intervene and fix.
… I think I got it through?…
Back on the Opal Bandwagon
Tasks were thinning. We deployed the post-download pop-out module. It became really apparent that we should also highlight Genome Studios’ contribution to O3DE workflows through the Dev Tools. With them together, you basically have the entire development pipeline complete and functional.
If there’s nothing to gain financially from free software, we should at least be able to build reputation around our contribution to the ecosystem, and our capacity to know the actual needs of developers working on O3DE production.
So, to better represent that work, we made a very small and sweet site dedicated to the extension. It’s very straightforward and simply gets the job done, so I just had to throw together some screenshots, make sure everything was captured in docs correctly…
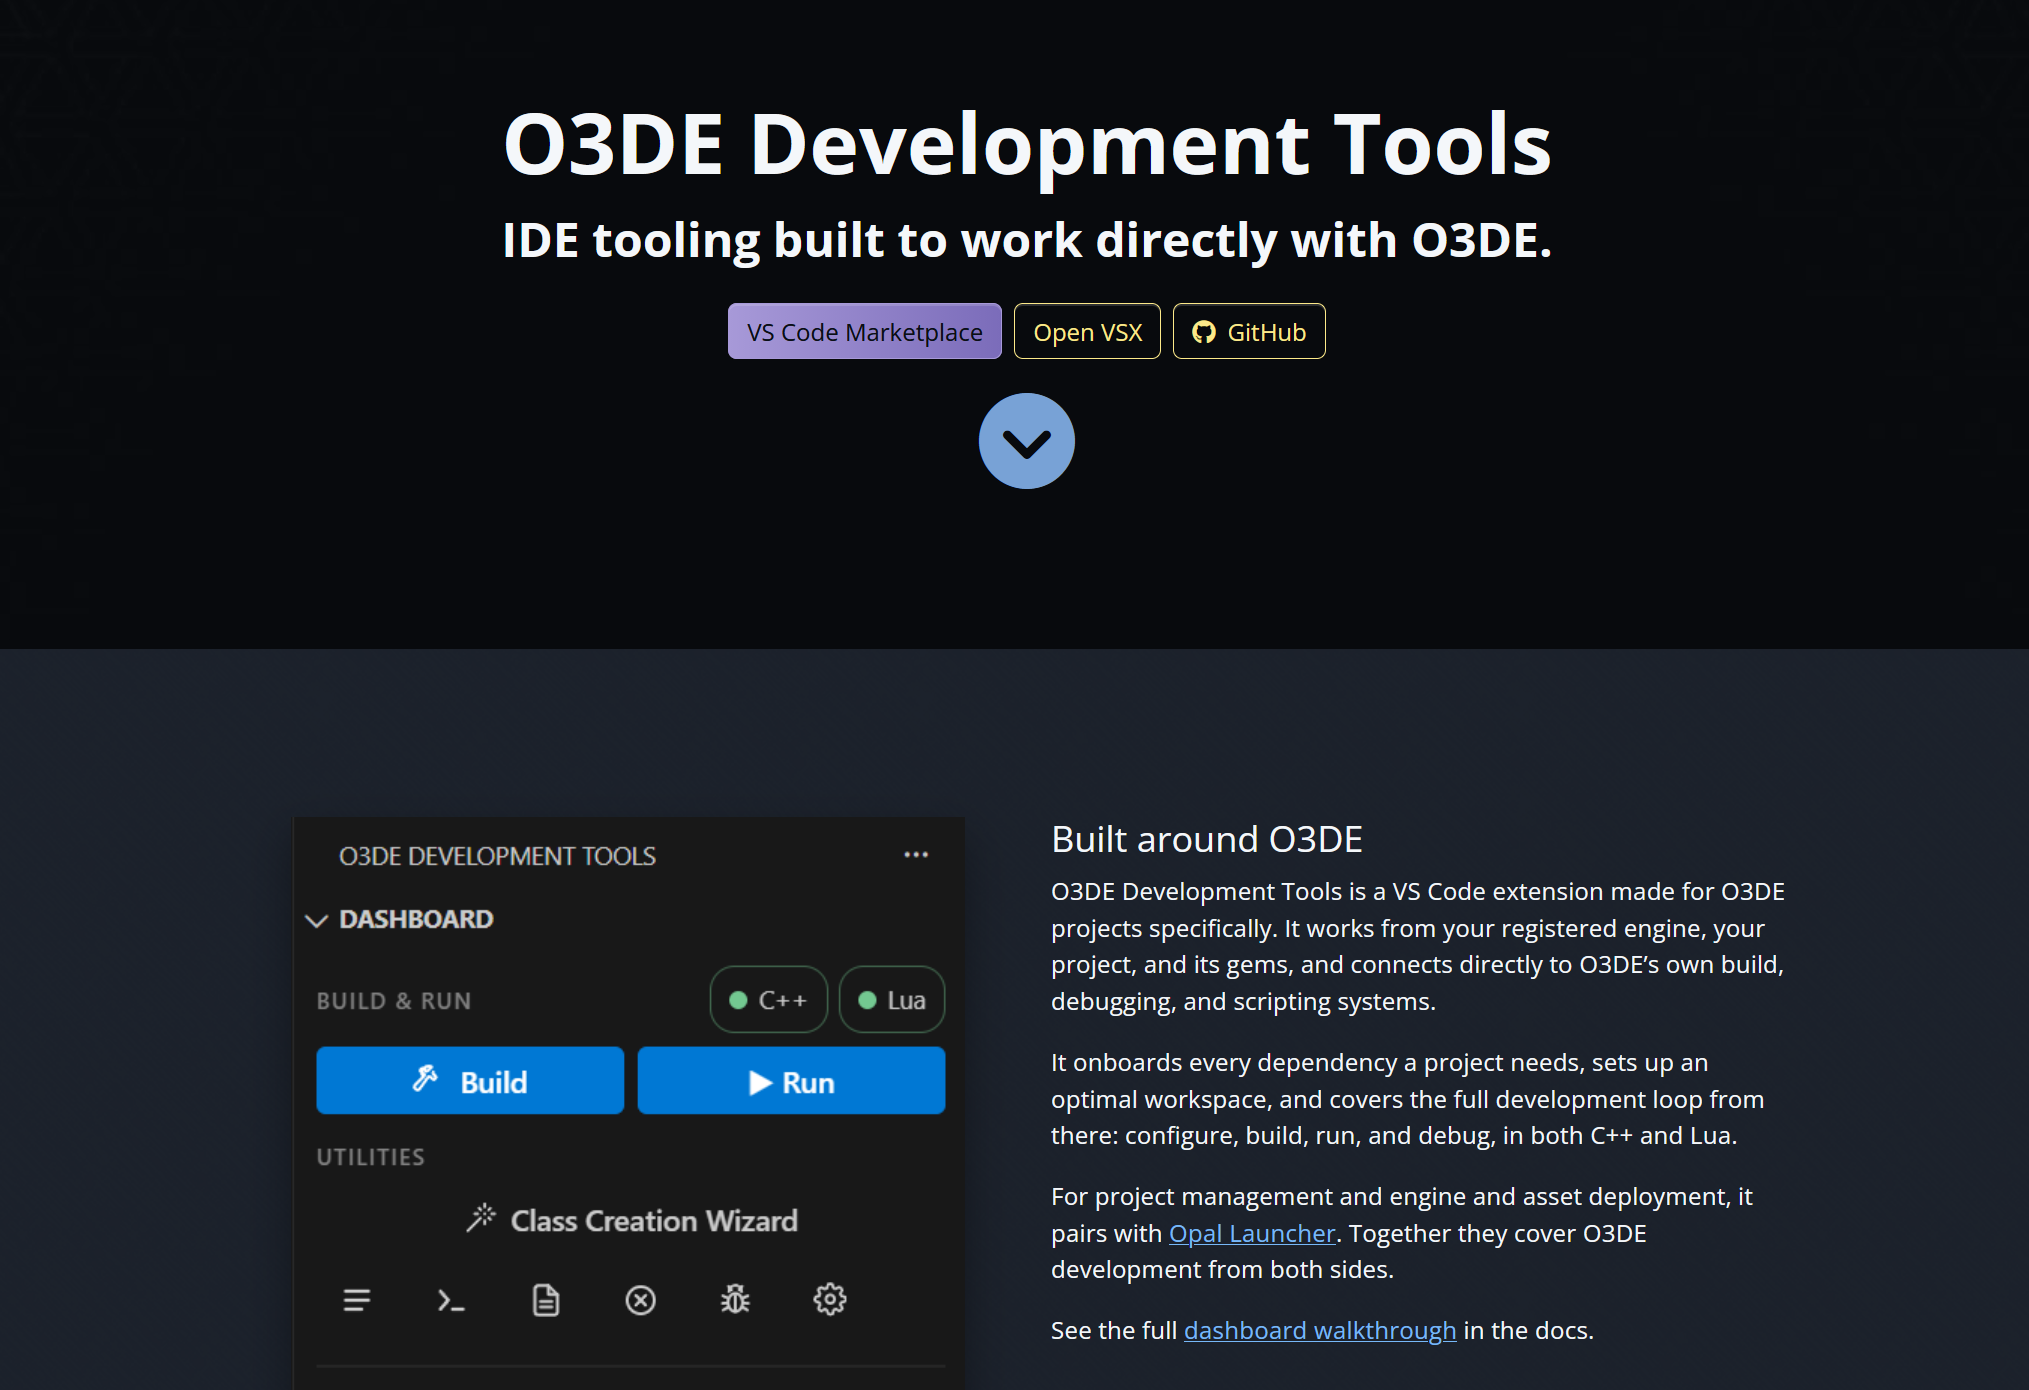
Again, this is no holds barred. We want Opal and our work to be front and center, hard to miss, and clearly proving its value to anyone who runs into it.
So then speaking of no financial gain…
I have to admit, after years of working on projects that end up free… Comics, Animations, Interactive Sites, Games…
I can’t say I’m all too enthused by spending months making yet another free thing…
Voicing it to my partner, and my frustrations therein, she firmly insisted I put donation-support links in the sites and Opal itself.
It can come off in bad taste, especially when we represent our very small studio as a company doing the work. People can feel like, “Why is this game studio asking for tips?” A major worry of mine, as Genome Studios exists off its reputation.
So I buckled… If we’re going to do this all the way, no holds… I guess we gotta be a little shameless.
At this point, we’re now scraping the bottom of the barrel. You can now count the remaining tasks on one hand.. This was getting pretty cool, considering that it’s not very easy to get this truly far in. It’s a very unfamiliar but welcome feeling, for sure.
So with this newfound liberty
I returned to doing some free-time work… Nothing better than taking a break from working by working more!
On the menu today? Trying to figure out how to handle the O3DE GUI Flattening.
So, some time ago, I had brought together a prototype of my vision for a new O3DE editor theme. At the time, I scrubbed over every style element throughout the editor and created “$tokens”, markers that indicate a place for a theme value to sit in the editor.
This ended up resulting in exactly that: A theme editing window that can change and redefine the values used to display the entire O3DE engine. It was very highly received, and many users were so excited to get it in, myself included.
It, like the Class Creation Wizard, was waiting for the upcoming Qt6 implementation to drop.
Good news, it did! Bad news… Well… the theming system was a brute-forced mess.
Alongside that, it provoked investigation into the performance bottlenecks in using the O3DE interface in general. This was outside the purview of the theming system, but I figured while I was doing a massive “raze it all to the ground”, I could see what could be done.
Months later, it turns out that QtStyleSheet is absolute garbage… Like it adds entire seconds to actions in the editor where they should be taking indistinguishable milliseconds. The significant contributor to common user issues where when you rapidly click around objects you should absolutely be able to click around, the system chugs and you can accidentally drag and drop something or deselect things, or anything else, while the system is catching up through the chain of unexecuted actions.
Awful, common since the day I started using O3DE… This needs to be rectified.
Alongside that, I got obvious and correct pushback regarding the theme. We need to fragment the prototype into incremental feature realizations:
– We need to simplify and “catch” the entire visual GUI exactly as it is into the simpler mechanisms for styling. Flattening the dozen stylesheet layers that are applying to some elements in the engine, causing those multi-second hangs.
– We need to then transfer the coded values to a remote destination and replace the local values with the $tokens, again, ensuring that there’s absolute perfect visual parity.
This means that by this stage, the editor actually hasn’t changed at all. 100 times more performant, but indistinguishable from what has always been there: the BlueJay UI theming model.
After that, we can finally work out the theming edit window and actually create a new default theme using those features. Again, we’d likely break that into 2 tasks:
– Create the theme editor, leave the default theme as the baseline. Nothing new.
– Create and submit the new Theme. Proving that it touches and creates a fully encompassing theme, with no mistakes in the final recreation of the editor.
I have also received pushback regarding actually submitting a new theme to modernize the O3DE editor. Users have indicated that I am haphazardly razing the BlueJay UI graphics system with some individually curated and unprofessional replacement.
This means there’s likely a pass that needs to happen between the Theming system and the actual “Modern Blue Steel” theme implementation I had created. Needing to be documented and thoroughly realized in a designer-friendly format as a BlueJay v2 project. Where, only at that point of sign-off, can I actually proceed to realize the design within the theming system.
That extra effort, while I recognize is valuable for long-term record and consistency in realizing the editor’s interfaces into the future, is an exhausting additional prospect where this entire process is already proving extremely costly.
How costly IS it?
I haven’t even started sharing the actual work I’ve been undergoing for step 1: Flattening the O3DE GUI Styling for significant performance increases and visual parity.
Because I’m starting completely from scratch with the sole task being nothing but breaking down the rat’s nest of QtStyleSheets representing the graphics of the editor, I’ve had to very drastically change my goals and methods for realizing it. I can’t brute force it; I cannot fudge the visual parity…
I need to not only realize the functionality, I also need to proof the benchmarking and actually log the data. Then I also need to show clean and easily interpreted underlying code. Because this is completely razing a system of chains and chains of styles stacked on top of each other, there are absolutely significant code changes to that restructuring. Converting the stack into a single visual execution per graphical element.
It’s a MASSIVE job.
But I have good news! Slowly but surely… and I mean very slowly… I’ve been seeing some culmination of my efforts: Graphics are starting to look closer, and the performance is already proving to be a measured 4-5x faster than the original function.
It is a fussy and mind-numbing process, though…
So here‘s how I’m doing it.
The first, and easiest way to start seeing changes with the editor GUI is through the QtWidgetGallery. This is a nice little utility that shows the elements that compose the editor interface in a massive catalogue of rows of elements in a previewer.
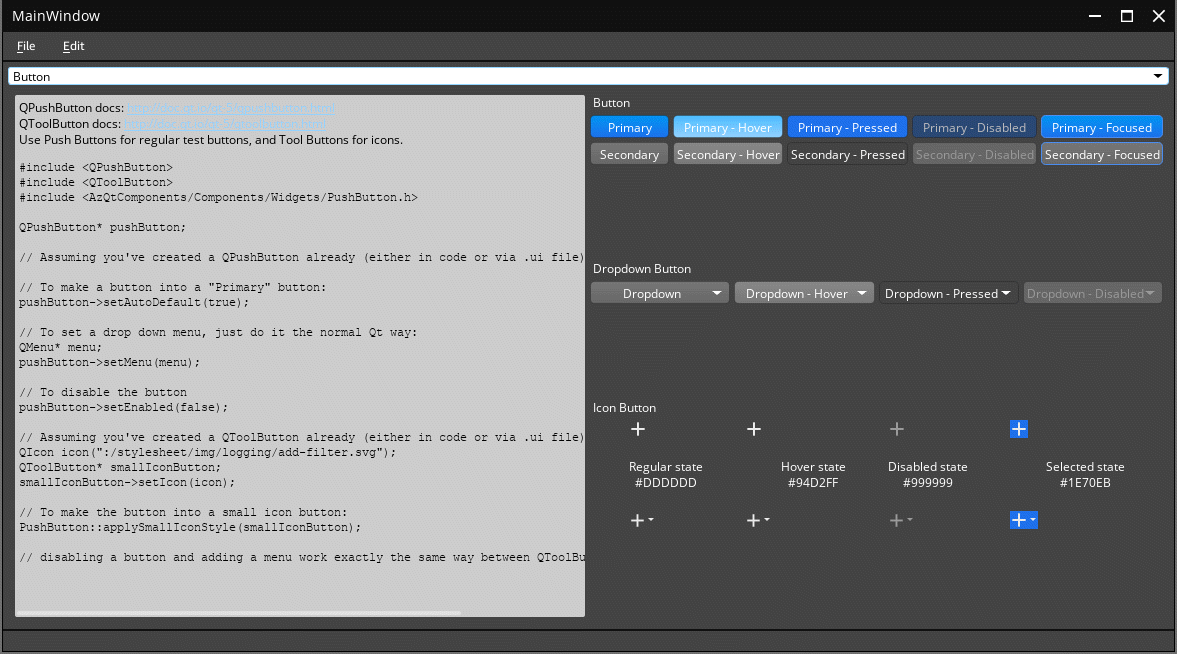
It’s a good first start, and a great way to scope exactly how many different elements are actually available and at play in the Editor.
At first, I was trying to make edits, open the gallery, surmise the errors based on my intuition of how it originally looked; sometimes easy, given how broken the graphics would become. But this proved tedious, and honestly was not a very concrete way to judge the accuracy of the visual parity…
So I began running sequences of page-by-page screen captures. At first, manually, which was exhausting and imprecise. Next turning to actual scripts to do it.
If you enable the QtForPython gem, you can run your project and its tooling with python commands. Now, things started to get interesting and actually viable for reaching the true magnitude of the specs of this stage of work.
I would run a script that steps through everything, screen grabs, and outputs them into a destination folder. First for the default native editor, then for the edited “flattened-unstyled” model.
I then started using this A/B comparison gallery HTML page. You can now see the native screencap RIGHT beside the edited screen. There is even the shmancy feature to take the native screen, then swap it with the edited pair exactly in place with the spacebar.
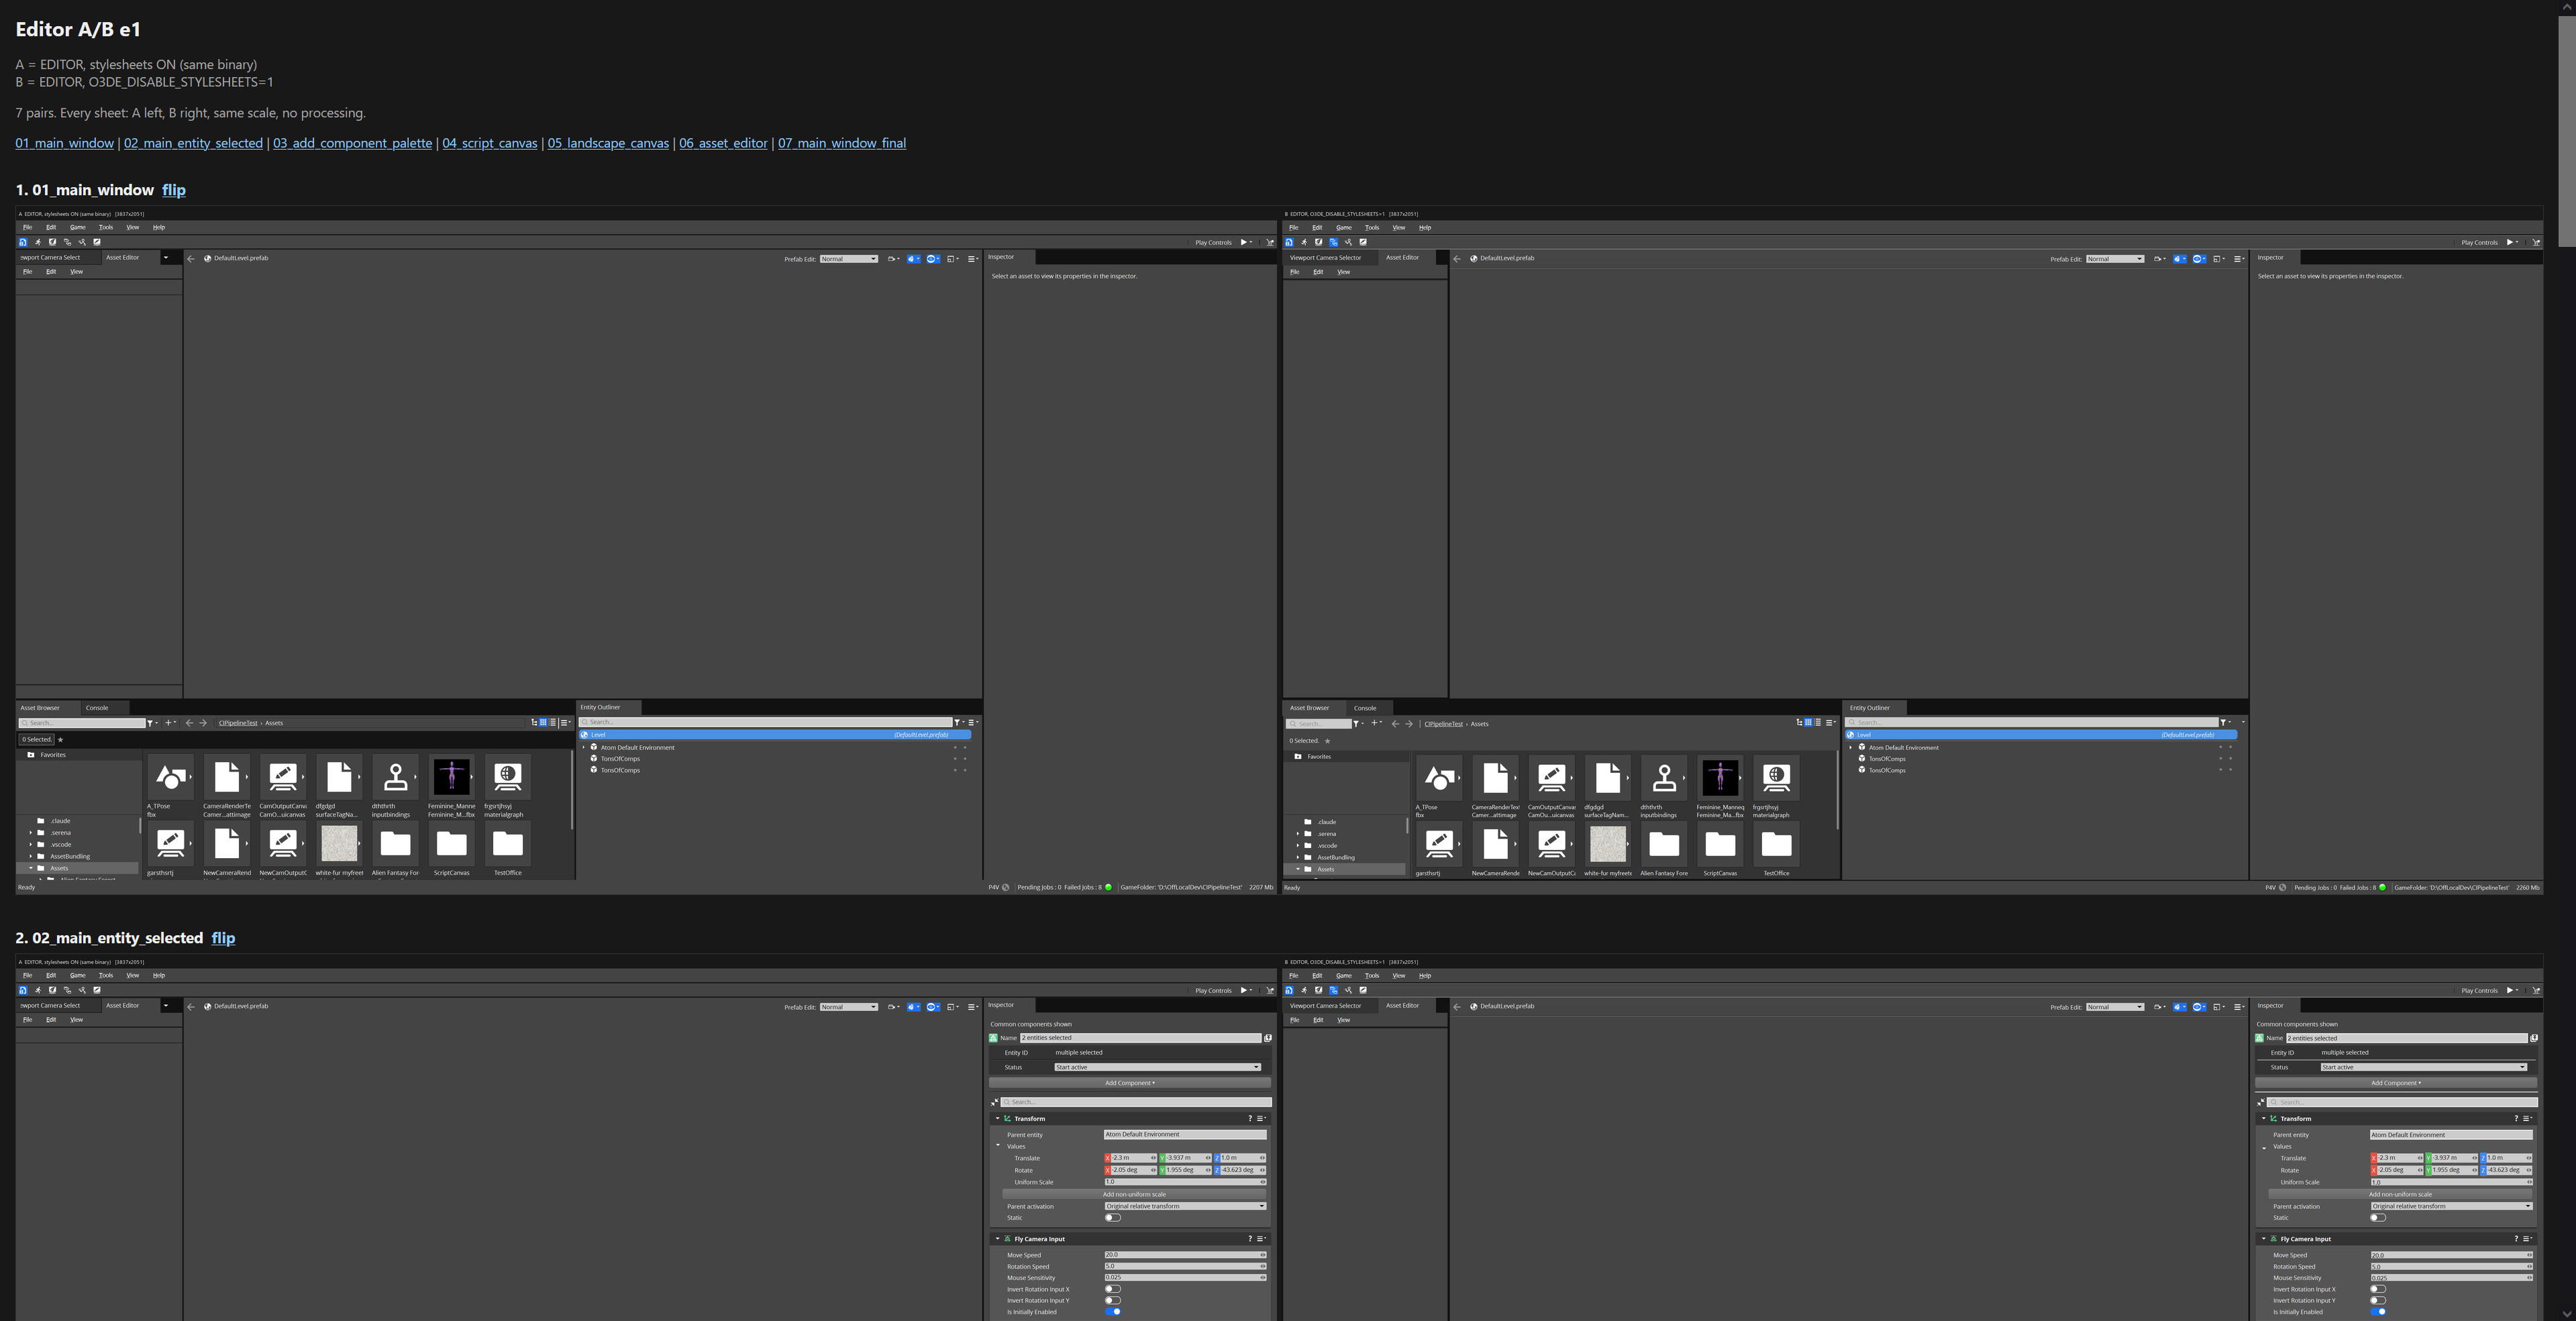
Now you can rapidly, albeit still exhaustively, scrutinize EVERY SINGLE SCREEN in the entire QtGalley. This actually got me far into it. The Gallery started to become quite hard to distinguish, a good sign.
So I exitedly switched to the Editor to see how good we got it.
Oof…
Yeah… so it turns out that the editor is more exceptions than the rule… There were SO many aspects that were an absolute mess. Not because of my style work, but because the style work is built on a fully unstyled foundation. Massive swaths of legacy colours and formatting across the entire engine were up front and dominating the editor. Even with so much already realized in the QtGallery.
Stuff looking like this:
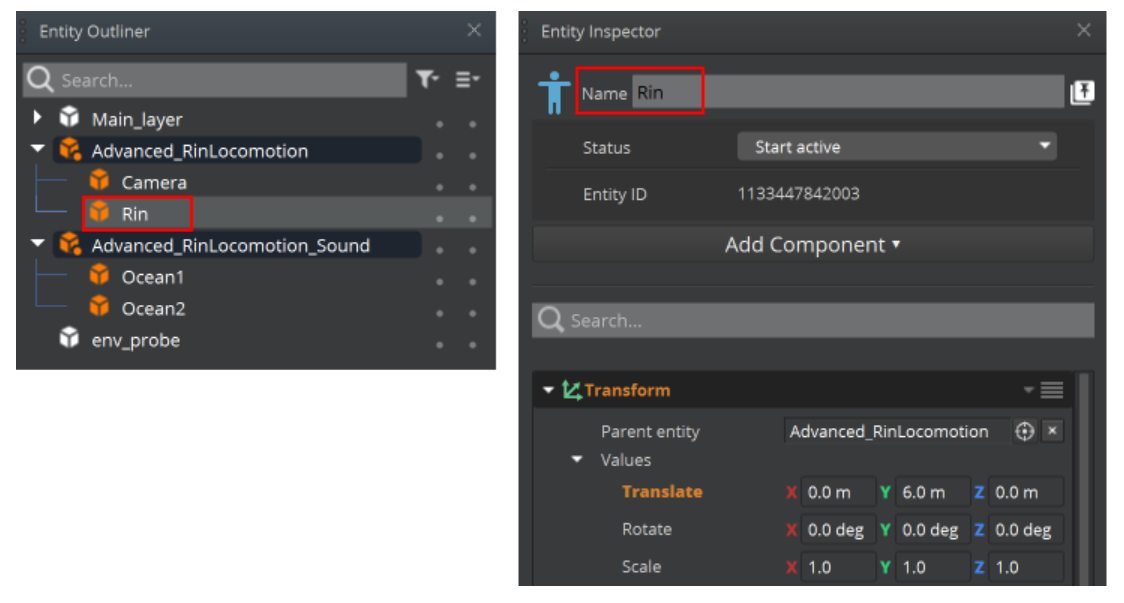
Honestly, it’s actually probably good that we’re going through this flattening process. It seems that there are so many layers built upon layers that we really should strip all the excessive unused details and just take the editor at final face value.
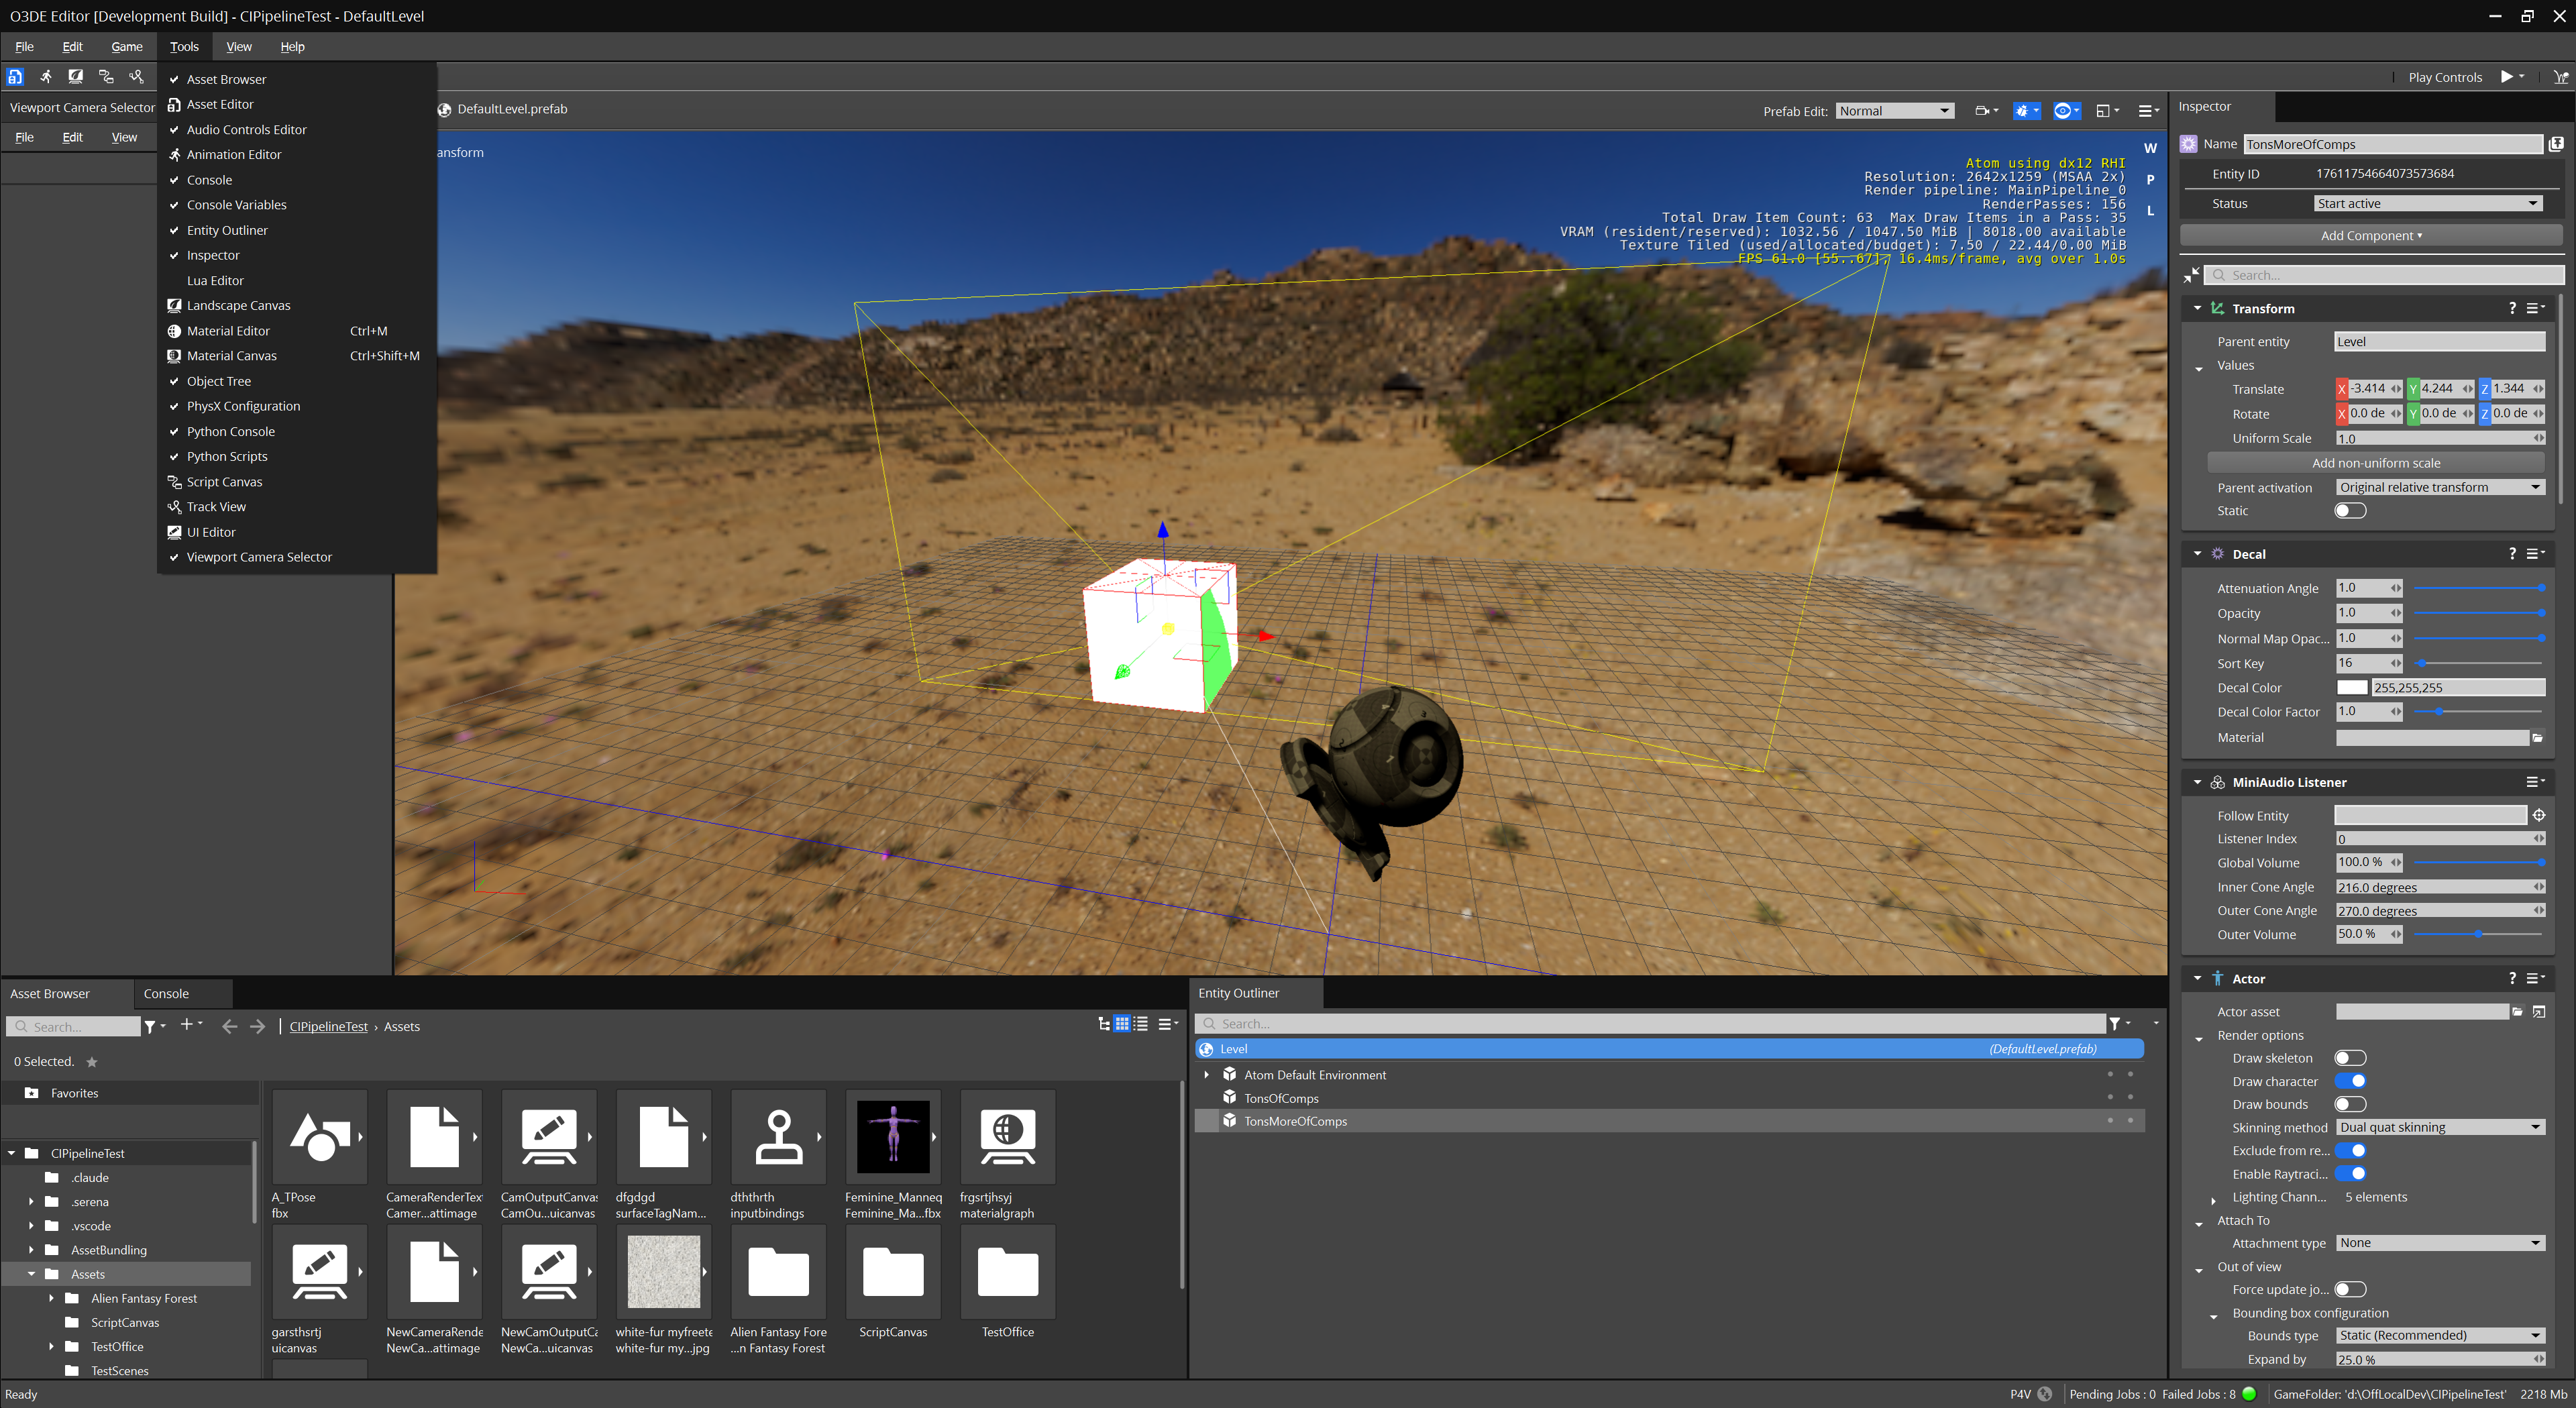
But now I need to scrub the QtGallery AND Editor. And fast forward, I need to scrub the individual editor windows like LyShine UI, Script Canvas, Landscape canvas… And then also scrub menus and popouts, like the Add Component menu…
So I went from like 35 screens to 202 screens…
Things have improved quite a lot by this point, but there’s still so much that’s wonky and out of place… It’s going to be both an incredible effort to get visual parity, but then the same level of effort to consolidate many “exceptions” that share the same look into a core definition for the theme to simplify. It will be drastically more effective to have 50-100 colour values in the theme over the 1100 unique element values that currently exist across all styles and all elements and all toolsets.
Honestly, I’ve had the nagging idea to develop the A/B tester into a publicly hosted evaluator tool to request users A/B test and then use markers and comments to highlight target edits across the system… It’s mind-numbing, massive, and incredibly time-consuming… Even when the workflow has been made as optimal for reducing tedium as possible.
So to decompress from my decompression work. VEGETATION!
Yay, cathartic Vegetation System work! I’ve been starving for actual game dev anything work.
The thing, too, is that I aim to be reasonable and calculated with the progression of our game dev work. We’ll start small and grow as our tech evolves and grows… But I also still dream, with a fiery passion, about finally making “Awaken, Guardian”. And one of the most critical and necessary features is to make RICH RICH VIVID vegetation and biomes. If the world can’t drag you completely into its domain, I’m doing the job wrong from the get-go.
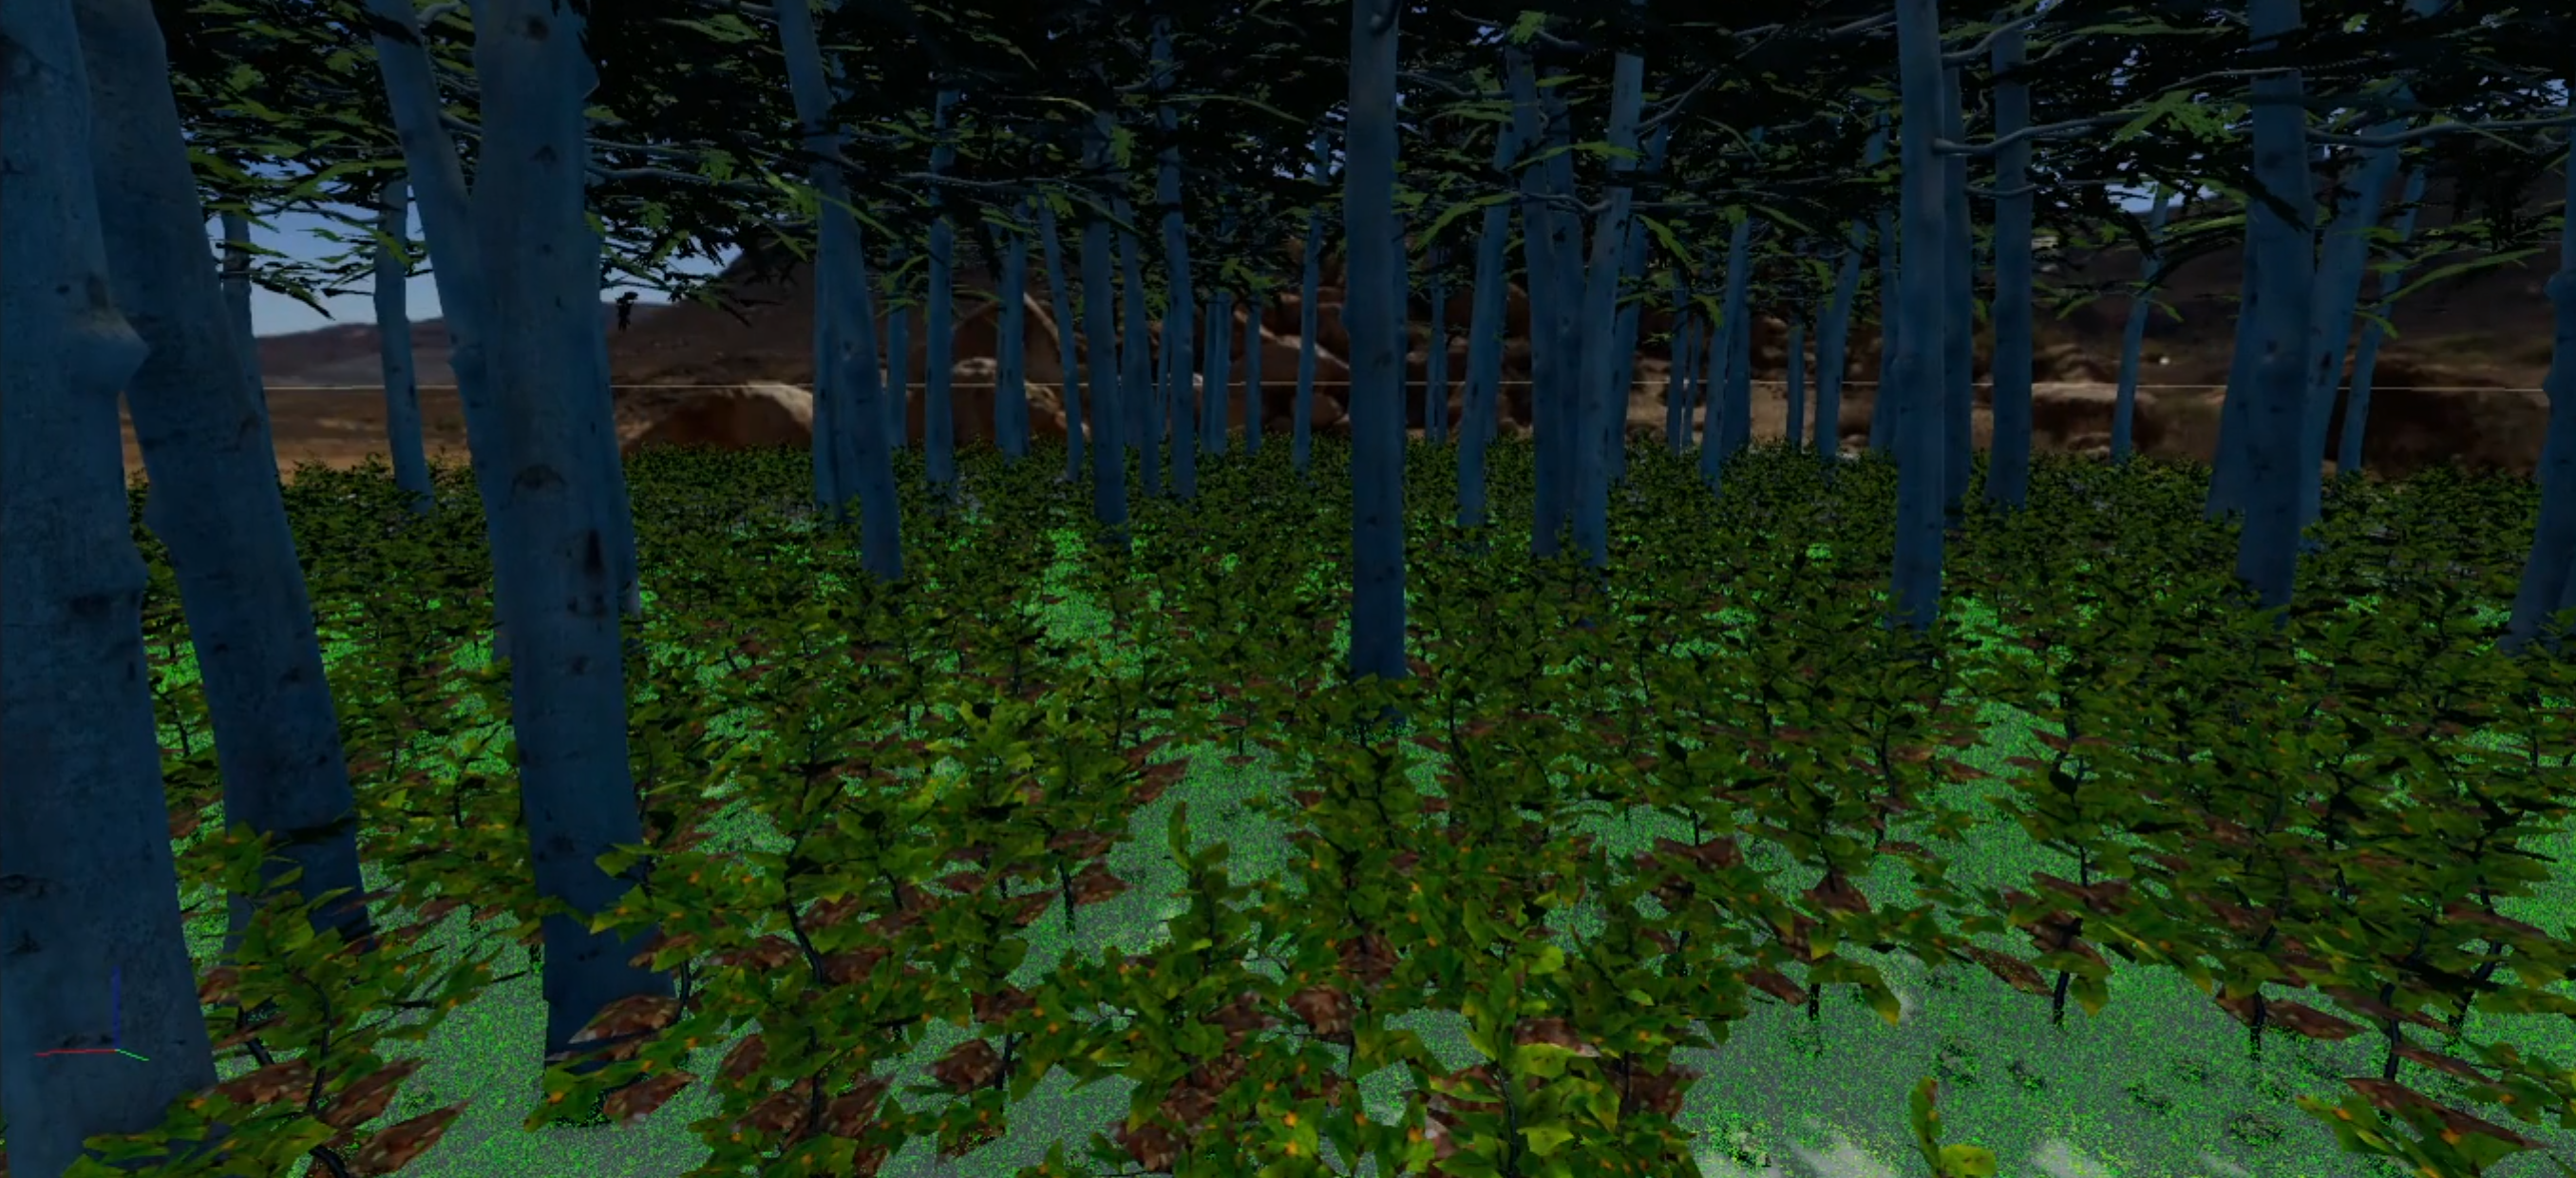
So, to scratch an itch: I thought maybe I’d figure out how to get the vegetation to actually work… Like show leaves and branches instead of massive messed-up planes of colour.
This:
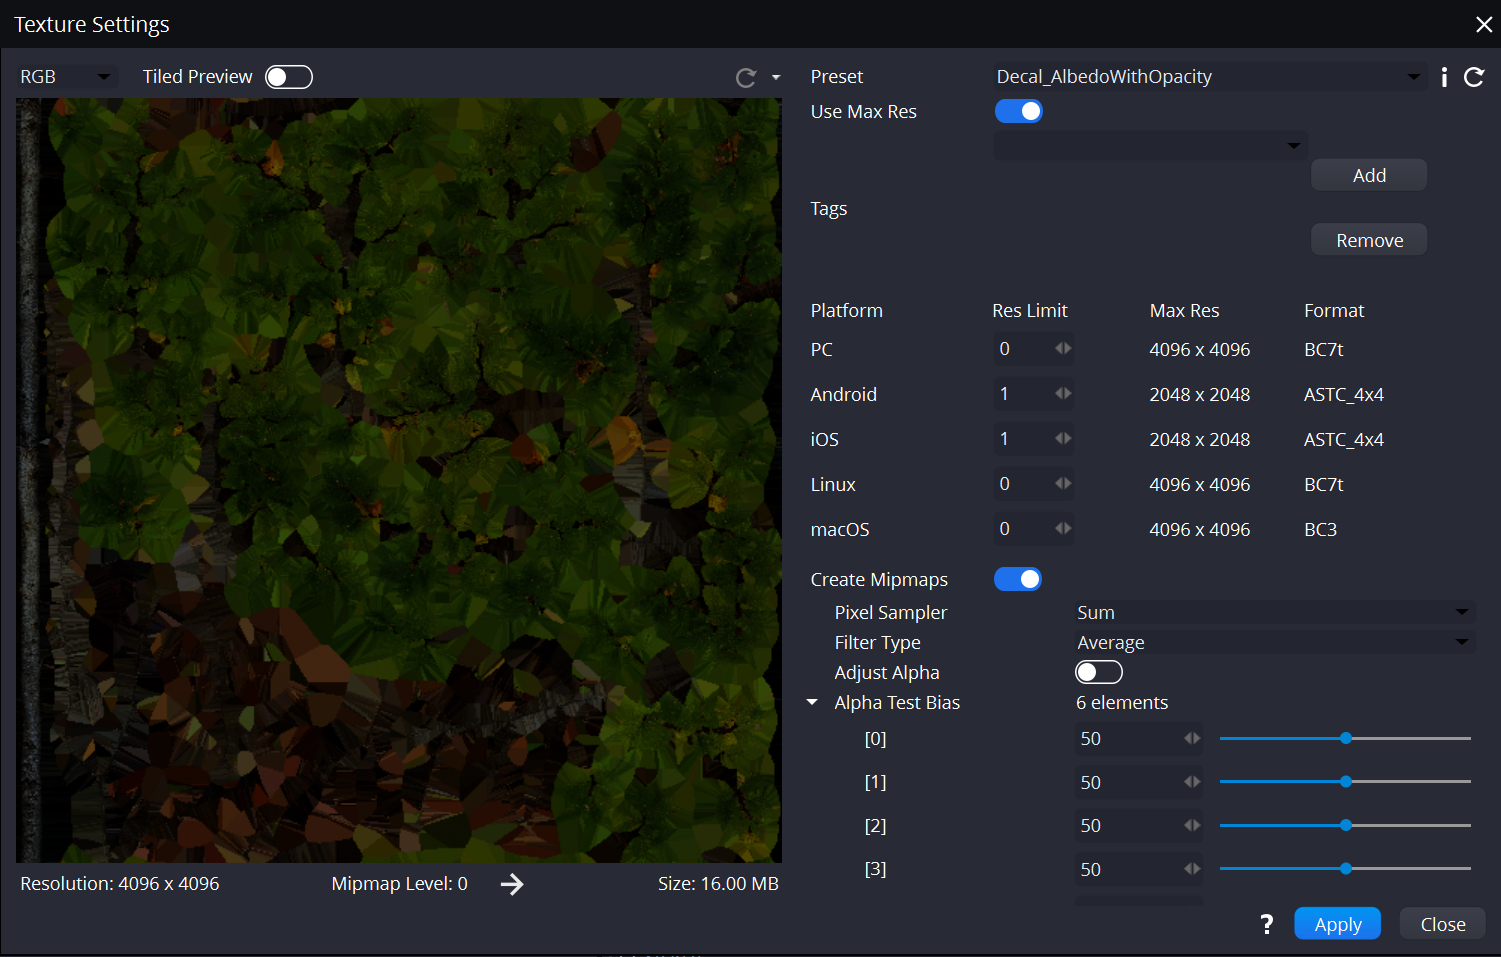
Well… Turns out there’s a magical combination of settings hidden away in the “Edit Texture Settings” window. You right-click a texture, then [Edit Texture Settings], and you end up with this screen:
With no particular ease, I was able to transform the broken, improperly textured vegetation into actually working vegetation!
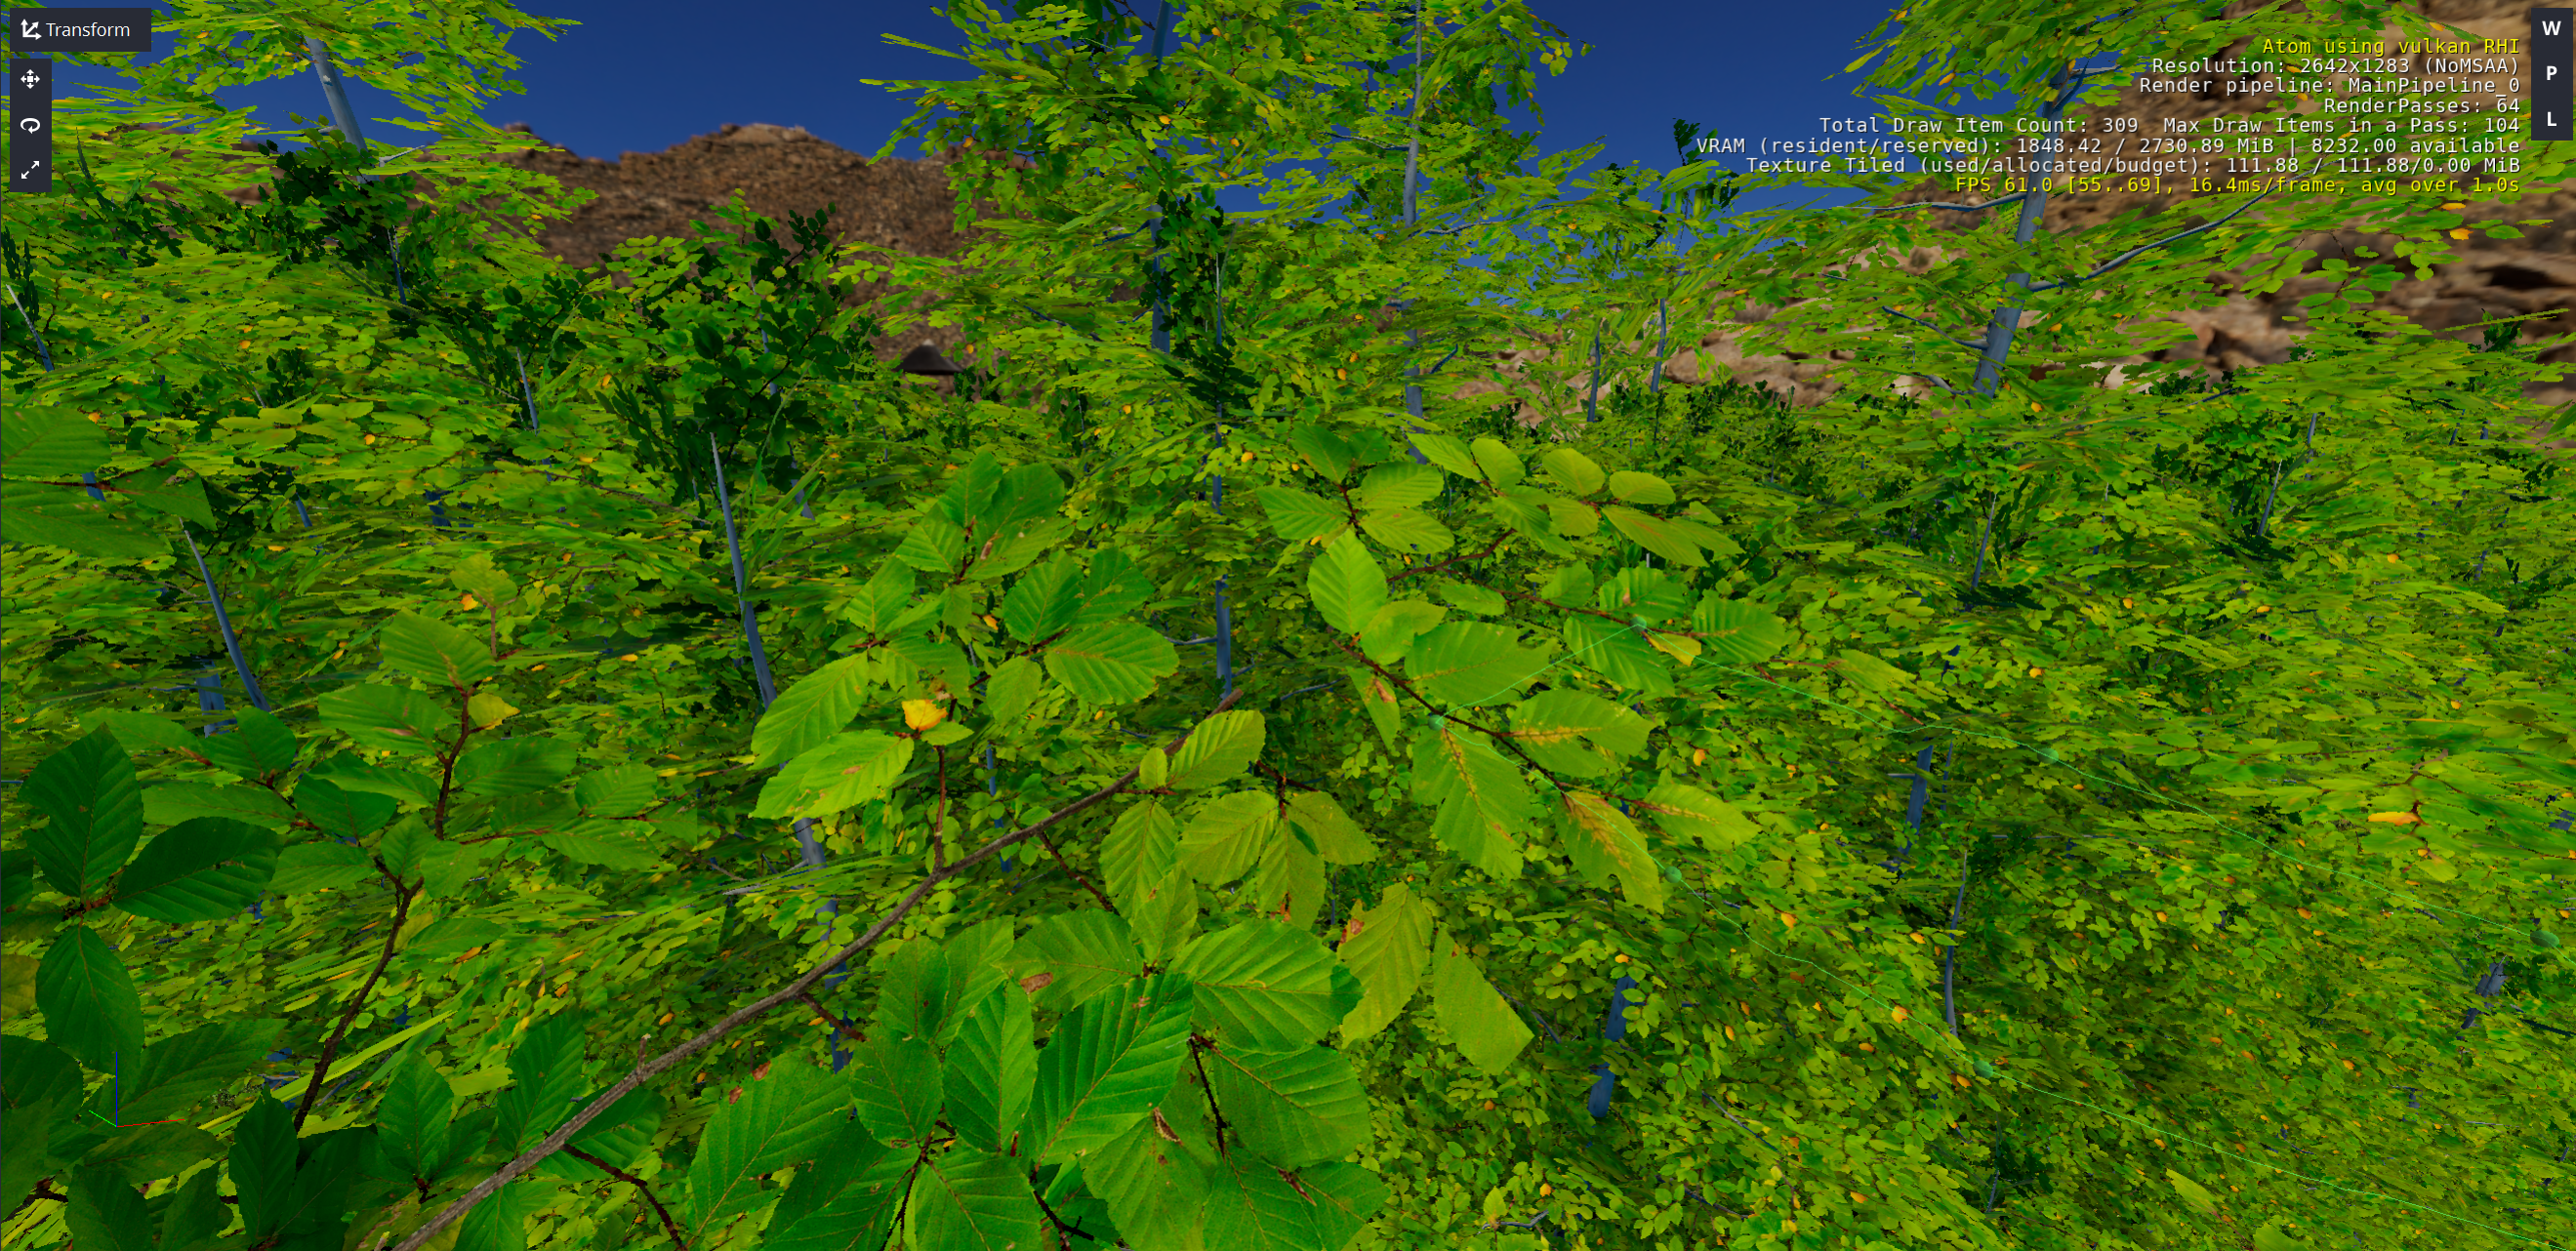
That definitely got me pretty excited to finally start actually testing what sorts of formations and landscapes I could get going.
Obviously, from there, the performance was also a massive necessity. I need to be able to make massive swaths of natural environments, and at this current point that was not possible.
First up were massive culling improvements. Thankfully, I have been getting feedback from a colleague on the nuances of how to actually reach into the deeper extents of vegetation performance… This would not be possible without that advice, even while using Horizon Vegetation Systems GDC talks as reference.
After that, I started tackling authorship-side performance improvements. Introducing LODs and Billboards for incremental scaling down of graphics. Up till now, I was using Max Fidelity trees and vegetation into the depths of the view. Then introduced quality bands and their various offsets, tied to the LODs; you can now define where and when the vegetation falls back to basic graphics, up to the final billboarding band. Another solid one is “thinning”: basically, as the vegetation falls into the distance, you outright skip some of them and only show a fraction, reducing the sheer bulk of rendering items, as well as simplifying the actual visual field. One of the big problems, which I haven’t yet had the means to work on, is that when you have the sheer magnitude of full graphics, the distance starts to shimmer with pixel changes. It’s incredibly noisy, ugly, and distracting.
I then progressed back to the authoring tooling. Now that I was starting to be able to make vegetation in a large footprint, the actual outcome of the placement rules and features was disappointingly homogeneous. To bring out some extra depth, I introduced placement jitter, noise culling, and sub-spawning. I also refactored the placement rules and vegetation item rules to allow for my favourite pattern in O3DE, Polymorphic Subclasses. You make “ItemParameter” and “BiomeRule” classes, and then you can populate Vegetation Items and Biomes with n number of unique features, and can simply keep adding to the modular pool. The powerful side effect of this is that the actual file size for these various elements is literally only as big as the collective definition. So simple items and biomes with few rules are reduced in size; this is nice in comparison to making EVERY item, and EVERY biome carry EVERY POSSIBLE option, then leaving 95% of them disabled, yet needing to store all the 0 values for everything going unused. Nothing incredibly impactful, but once you get thousands of items and hundreds of biomes, I’m sure it starts to impact the stored data.
Next on the Docket: Async Batching.
Up till now, when you’d make a change in the vegetation data, you’d literally halt and chug for some amount of time in a crashing state as the ENTIRE vegetation environment gets recreated. Now, when changes are made, they happen over multiple jobs asynchronously. The system still works very hard at that moment, but it’s spread over some frames and is much nicer to work with, seeing everything start chunking into place. This also deepens the functionality of the placement cells, allowing them to operate more autonomously in current and future functionality.
Finally, I was able to get to a HIGHLY desired feature. “Biome masking”. This is the process of authoring various footprints that get individually assigned biomes with a priority weight. You can then mask out sections that stack on top of each other and result in the top biome being generated in its designated space, followed by blends that gradate into the other regions and their biomes. This has the incredible benefit of allowing you to randomly place or activate biome masks procedurally in order to make spontaneous formations within a more generalize regions biome. You can think of a dirt path that can be spawned in, but it also has a dirt path biome, and manually configured road signs and fences and things. You just plop the entire thing in in a spawning sequence and the road places, the decorations appear, and the biome carves out the forest or whatever into some dirt and rocks and shrubs.
Now we’re getting into the Awaken, Guardian realm.
This stage again really pushed the performance hit for the system. So I had to return to figuring out what systems could be deployed to bring out that higher performance. I was definitely PUSHING the specs, but ideally you can still work out the ways to reduce the massive hit into a kinda-massive hit.
Cells were upgraded to now be able to identify if they’ve been made dirty by a change in biome mask, making it so not EVERY forest cell needs to be rebuilt. This was cool to see where only a few surrounding sections would go blank, then pop in asynchronously as they got regenerated. On top of that, biome masks were recalculating placements and data as the biomes were being weighted. A process was added where the biome masks would be flattened into a stored state so that when biome data or vegetation item data would change, the biomes would all update respectively, without having to recalculate the weights and stacks of biomes. All very powerful additions to authoring work, which was getting very heavy on the system; also impacting the runtime placement of spawned masks and whatnot… You can’t generate an environment where every single step of spawning ends up having to completely recreate the entire landscape from scratch every time something small is placed.
Finally at the end of my rope on this pass at Vegetation… A multi-day day-to-night undertaking, I left off with a massive performance benchmarking task. Because I was having fun, I kept changing the environment, the biome configuration, densities, LOD bands… Everything. This made benchmarking new changes and optimizations impossible because there was literally no ability to compare between changes and fixes. I even went so far as to download 50gb of lidar data of the City of Edmonton to create an actual shapely landscape of the Edmonton river valley…
Needless to say, I needed to actually create a benchmarking foundation. The same size environment, the same densities and items, the same camera perspective… And have it in an unchanging way. At this point in the Vegetation work, I’m shaving milliseconds from massive processes… Gotta actually be able to measure everything going on simultaneously.
What I was in the middle of getting implemented was cellular culling: When an environment and the vegetation in front of other cells completely block out the cell in the distance, just flat-out cull the entire thing. This and other quality and culling processes affect the shadows as well, which need their own system of both preservation and culling.
BUT, that will be for another day…
Forgot that “little bug” during demo recording?
Y’know that bug I didn’t wanna deal with for recording? Yeah, that’s a major blocker…
I literally knew it when it popped up a few weeks earlier and pretended it didn’t exist.. Then again during recording… Surprise, it’s 12 hours from launch!
So, on the 29th we set forth in a scramble to diagnose, resolve, and deploy incredibly significant fixes to this set of issues…
What it turned out to be is: When we were downloading the Source Code version of the engine, the GitHub setting for the project is to ONLY provide the codebase. Git LFS assets (images, music, videos, etc.) are not included. This resulted in you only downloading and installing HALF the engine… OOOOHHHH MYYYY FFFFF….
This was occurring for another reason when using the setting “Use Git to Clone Engines”, where the system wasn’t using “git lfs install”, the action that makes your clone understand it needs to ALSO get LFS files in the clone… Which has the added issue that we didn’t include git lfs as a dependency in the wizard and settings…
Of all the things to gloss over… it was literally having the engine exist and run at all. What an oversight.
A critical lesson in how regular exposure to pain points causes an eventual blindness to it. A costly lesson when you’re working with something for months on end and already have all the workarounds embedded in your muscle memory. This occurs often in O3DE development across MANY of the regular contributors. A new-user pops up and raises the problem and it always ends up: “Oh we just work around that like this: ‘____’. ” Baad, baaad. So hard to avoid, and something I fall for as much as everyone else… But it’s a horrific UX blindness that results in nobody actually addressing the core problem. Remember my mention of multi-second GUI hangs? Everyone is “just used to it”. It’s only JUST BARELY being fixed right now in September 2026.
We did it! Opal Launcher 1.0.1 was released on time, with a working website, demo video, deployment pipeline, and 2-week promo schedule! No crunch, nobody burnt out, and the software is incredibly stable. Now it’s up to the users to use it! We can’t be more proud of what we were able to make, the lessons learned, and the growth moments of fixing and addressing the issues that less experienced professionals would otherwise let slide.
Now, freed from our obligation to make for a concrete release, we can now delve back into the juicy feature development we put aside. We’re incredibly excited to get v1.1.0 out and in everyone’s hands soon!
THANKS EVERYBODY!
This was a heifer of a Review. 2 weeks late. Turns out doing this sheer magnitude of work ends up impacting you, even when you haven’t done any crunch. (Buuuuurnnnnnnn oooutttttt~)
Thanks as always for diving into our many tales and troubles of the day-to-day Genome Studios. We’re delighted to still be here chugging away enough to even have these stories to tell. This month was a major milestone for us, and things are only going to get more interesting from here. So stay tuned! I’ll see you post October!
Btw, you can now rep Genome Studios on Discord with our brand new shiny server tag! Every bit counts!

P.S. Did you know you can keep up with our Month in Reviews by signing up for our newsletter? Just check below!
Want to keep track of all Genome Studios news?
Join our newsletter!